Red Velvet Macarons
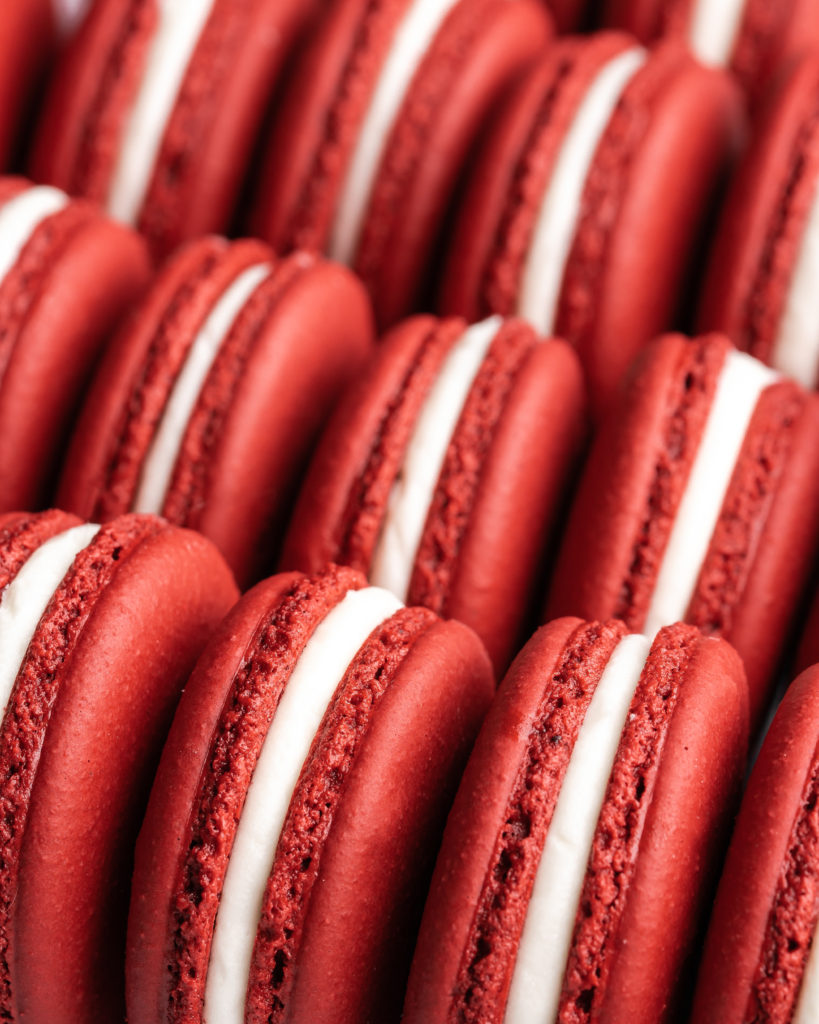
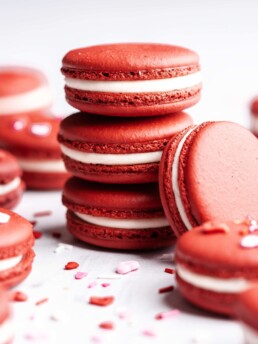
Boldly bright and filled with cream cheese frosting, these red velvet macarons are an excellent snack for any valentines day festivities. Don’t be fooled by their petite size, these vibrant red velvet macarons are full of flavor! The creamy bright white filling perfectly contrasts the bright red hue of the red velvet macarons. These little beauties are the perfect dessert for any Valentine’s festivity!
If you are new to macarons, and want to master how to make Red Velvet Macarons be sure to check out my how to guide for making macarons!
Note: This post contains affiliate links.
When is a better time of year than now, to have a fun take on macarons? We all know during valentines, and its surrounding days, that red velvet is king! It is the one time of year I don’t feel so terrible about eating foods that are loaded with food coloring, by the buckets worth. These red velvet macarons are absolutely perfect. Boldly bright in colour, perfectly balanced in sweetness, with just that touch of cocoa goodness to round them out. They are absolutely perfect to give to a special someone, serve at a party, or even hand out at functions.

That Filling Though!
As with red velvet cake, I decided the filling had to be cream cheese buttercream. However, I wanted the filling to be quite prominent in the cream cheese flavor. As macarons are, by nature, already quite sweet, I decided to use less confectioners sugar. This resulted in a buttercream that was ultra creamy and not overly sweet, and as mentioned before, quite prominently flavored with cream cheese. Furthermore, the bright white color of the filling is the absolute perfect compliment to the boldly bright red color of the red velvet macarons. A match made in heaven!

Dutch-Press Cocoa
This recipe uses Dutch-press cocoa, as I find it is far superior to regular cocoa powder in flavor and in color. Dutch-press cocoa is created by alkalizing cocoa powder, leading to a richer deeper color and a flavor that is less astringent. The less astringent taste allows that flavor of the chocolate to come through more, therefore it tastes, well, more chocolatey! If you do not want to spring for Dutch-press cocoa powder, regular cocoa powder can be used in this recipe as well, however I strongly recommend trying Dutch-press out! A link to my favorite brand of Dutch-press cocoa powder can be found here.

New to Macarons? Do Not Despair!
If you have never made macarons before, and you want to master how to make red velvet macarons, or any macarons, don’t worry because I have a thorough guide on how to become an master macaron maker! The how to make macarons guide is full of tips and tricks, and step-by-step process on how to make perfect macarons! The link to that is here. If you have any questions of concerns feel free to comment below!
Get the Recipe: Red Velvet Macarons
Ingredients
Red Velvet Macarons
- 200 g Almond Flour
- 200 g Confectioners Sugar
- 20 g Dutch Press Cocoa
- 150 g Egg Whites,, divided
- 190 g White Sugar
- 60 mL Water
- Red Gel Food Coloring
Cream Cheese Frosting Filling
- 1/2 cup Unsalted Butter,, at room temperature
- 1/2 cup Cream Cheese,, at room temperature
- 2 cups Confectioners Sugar
- 1 tsp Vanilla
Instructions
Dry Ingredients
- Place almond flour, confectioners sugar, and cocoa into food processor, pulse about 20 times. Sift into a large bowl, discarding any large pieces. Do not push large pieces through sifter. Then add 75g of egg whites into the bowl. Thoroughly mix together to form a paste. Feel free to be aggressive with your mixing. When combined, cover and set aside.
Making the Meringue
- Add remaining 75g of egg whites into a stand mixer, and set aside. Meanwhile, add white sugar and water into a small pot, and turn on medium-high. Once mixture heats to 110°C (230°F) turn on stand mixer to high and beat egg whites.
- When sugar mixture reaches 118°C (244°F) and egg whites have reached stiff peaks (but not dry), slowly drizzle the sugar mixture into the beating egg whites, ensuring that the stream is slow and is drizzling down the side of the bowl first. Then continue to beat the meringue until it reaches the ‘bird beak’ stage. Add food coloring, if desired, at this point and quickly mix into meringue, without overmixing.
Macaronage
- Add a large dollop of meringue (about 1/3) into the almond mixture paste. Work meringue dollop into paste to loosen up the paste to make it easier to work with. Do not be afraid of being aggressive at this point, we do not need to worry about knocking the air out of this small amount.
- Add the rest of the meringue into the bowl, and fold it into the paste mixture to combine. Be gentle and careful not to overmix or over-deflate the meringue. The mixture is ready to be piped when it ribbons off your spatula. If it is coming off in large V shaped chunks it still needs to be folded further.
Piping and Drying the Macarons
- Add mixture into a piping bag with medium to large sized round tip. Pipe small circles of batter onto a cookie sheet fitted with a silicone baking mat or parchment paper. Ensure piping bag is held straight up and perpendicular to baking sheet. Using a stencil or a macaron mat makes this process much easier and fool proof, I try to make my macarons around 1½” in diameter.
- Tap the baking sheet multiple times against counter to remove any air bubble from the macarons. If some air bubbles still remain, use a tooth pick to gently poke them out.
- Preheat oven to 300°F, or 275°F for convection mode.
- While oven is preheating, allow the macarons to sit and form a skin. This skin will ensure the macarons bake up and not out, giving them those classic “feet”. This skin should form anywhere from 8 minutes to an hour. You know the macarons are ready to be baked when you can touch them lightly without having the batter stick to your finger. Keep checking them to see if they have formed a skin– overly dried macarons are just as much of a problem as under-dried macarons!
Baking
- Bake for 15-20 minutes. Your bake time will depend on the size of your macarons. Check at 15 minutes, and if they are not ready then keep checking every minute. The macarons are ready when the tops are firm and do not move around their base at all.
- Allow the macarons to cool completely before attempting to remove them from the sheets/mats/parchment. When cooled, find “perfect pairs” of macaron halves and set aside to be filled with your choice of filling.
Cream Cheese Frosting Filling
- Add butter to a stand mixer, fitted with the whip attachment. On a medium-high setting, whip the butter for 4-5 minutes, or until it is light in color and fluffy. Add cream cheese, and whip until further for about 2 minutes, ensuring that you are scraping at the edges of the bowl.
- Add confectioners sugar in 3 batches, and mix on low until all the sugar is added and well combined. Add the vanilla, then mix on low to combine. Turn the stand mixer on high and whip for an additional 3 minutes, until well combined and creamy.
- Add buttercream into piping bag and pipe onto ½ of “perfect pairs”. The amount of icing should be a 1:2 ratio, 1-part buttercream and 2-parts (2 halves) macarons. The other way to get a perfect icing amount is to pipe the same dollop of icing as you did with the macaron batter. Add tops to bottoms, and place into refrigerator to “mature” for 1-2 days.

Great thorough instructions, made these today and they turned out great!
Thank you!