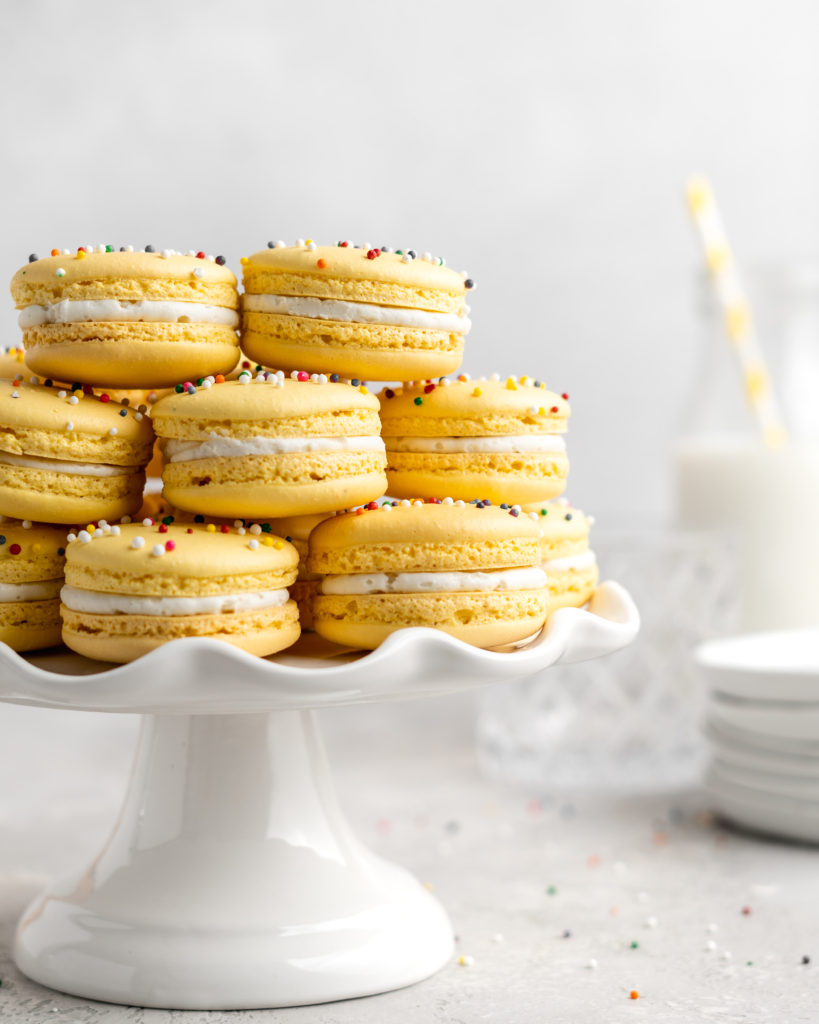
How to Make Macarons: A Step by Step Guide + Tips/Tricks
This easy step-by-step guide on How to Make Macarons, will have you well on your way to becoming a macaron master! I compiled these tips and tricks from everything I have learned over the years about the art of making macarons. Through trial and error I have found what works, what doesn’t, and ways to ensure success time after time. I have also provided my basic macaron recipe, along with thorough step-by-step instructions. This macaron recipe is excellent as is, but is also easily adaptable to any flavor!
Note: This post contains affiliate links
Ahh macarons! A pastry synonymous with beauty and deliciousness, but one that also evokes fear in a lot of people! While macarons can be quite finicky, they are worth the hassle it takes to make them, and by using a few of the tips in this post, you will be well on your way to becoming a macaron making machine!
My First Time Making Macarons
Before I had ever attempted to make macarons, I was like many people out there – very apprehensive about spending all that time and money to make something that may not turn out. After watching thousands (okay maybe not thousands – but it sure felt like it) of videos on YouTube, I attempted my first macarons. The results were mediocre – not amazing but definitely not a total failure either!
From that point on I became obsessed with perfecting my macaron making skills. After watching all those tutorials and testing out all the methods and tricks mentioned in those many videos, I have learned what works and what doesn’t.
Recipe is Easily Adaptible
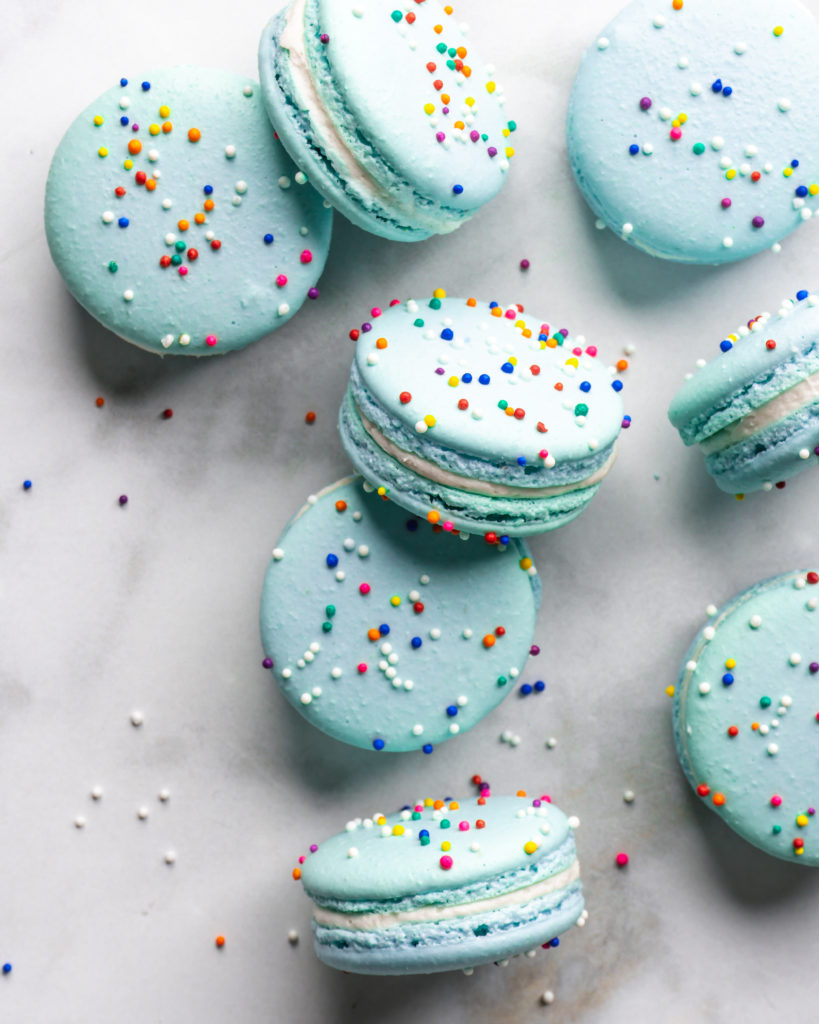
This basic macaron recipe can be adapted easily to make any flavor you can set your mind to, but are absolutely delicious as is! There are several types of fillings that could be used for these as well – buttercream, ganache, jam, custard, the sky is the limit!
Tips & Tricks for Perfect Macarons
Tip 1) Use a food scale and weigh everything out: This is why I only gave the recipe measurements in weight. Macarons have a very low tolerance for error. Volumetric measurement can result in a HUGE variance in the amount of ingredient used. So for something as finnicky as macarons, it is better to be precise, down to the exact gram, with the measurements. Better to be safe than sorry!
Tip 2) Age the egg whites: Separate the egg whites and leave them in a bowl that is lightly covered (I cover mine with tin foil) for 1-3 days at room temperature. The idea behind this is that you are dehydrating the egg white while keeping its protein bonds the same, resulting in better elasticity of the egg white. This causes the whites to easily whip up. Although this step tip isn’t crucial in making macarons, it just adds extra insurance that your whites will whip up. Furthermore, it eradicates the need to use cream of tartar or anything to aid in the whipping of the whites.
Tip 3) Wipe all utensils/bowls/apparatus with vodka or vinegar: Wipe anything that will be coming into contact with the egg whites with vodka or vinegar. This is to ensure no oil residue is present that would ruin your meringue!
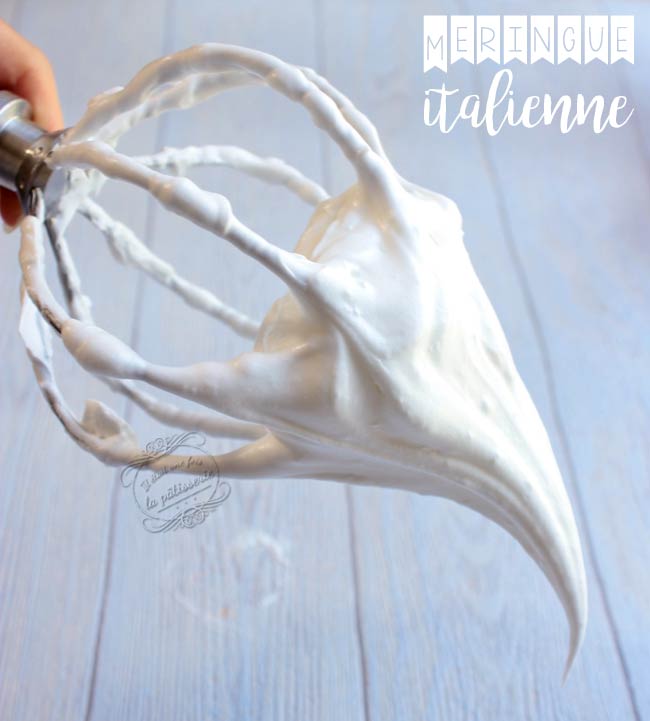
Tip 4) Use the Italian method of macarons: The French method involves whipping egg whites with sugar to form a French meringue. While the Italian method has more steps, I find it produces much better and much more consistent results time after time. This is because the Italian meringue is much more stable than the French meringue. The French meringue tends to be very delicate, making it very easy to overmix and deflate the meringue during the macaronage process (the process of combining the meringue with the dry ingredients). Furthermore, the look of the final product using the Italian method also tends to be nicer (to me at least), as the Italian macaron usually tends to rise more vertically than the French method.
Tip 5) Don’t under-whip or over-whip your meringue: An improper meringue can lead to loads of problems, namely hollow macarons! I have fallen victim to this myself! After adding the syrup to the egg whites, beat the meringue for about 2-4 minutes. Or the BEST way to tell if the meringue is ready is by checking if it can form a ‘birds beak’ or as the French call it the ‘bec d’oiseau’. The meringue should still be soft, but stiff enough to create a shape similar to the soft curve of a birds beak. Example here.
Tip 6) Stop folding once the batter ‘ribbons’: When the macaronage process is complete, the batter should flow like lava, and ribbon off your spatula. If it falls off in chunks it is under-mixed, and if it runs right off the spatula without ribboning, it is over-mixed! The ‘ribbons’ of batter should disappear completely into the rest of the other batter within 30 seconds.
Tip 7) Tap the pan and remove air bubbles: Smack the pan against counter, rotate 90° and smack again, continue until all sides have been smacked – doesn’t that sound funny haha. This has two purposes, the first being that is causes any air bubbles in the macarons to rise to the surface and pop – resulting in smoother and more stable macarons, and the second being that it causes the batter to flatten out along with any humps left over from piping.I usually smack mine more than 4 times. I just do it until I feel like all the air bubbles have surfaced and the batter has flattened nicely.
Tip 8) Use a toothpick to ‘pop’ any remaining air bubbles: Get up close and personal with your beautifully piped little macs and look for any remaining air bubbles. You are looking for any obvious ones, but also some hidden ones that may just look like a very slight irregularity on the surface, or even a tiny bump. Then use a toothpick and simply pop them, and lightly use the toothpick to swirl batter to fill the hole. I find if I skip this step I can sometimes be left with hollow macarons, so it is definitely important!
Tip 9) Allow the macarons to form a “skin”: This is crucial – I repeat THIS IS CRUCIAL. Do not skip this step whatever you do! This step allows the macarons to rise vertically and reduces the amount that it will spread out horizontally, leading to the oh-so-perfect little feet we’re after! The skin will form faster in cold dry climates, and conversely will take longer to form in hot humid climates. I live in the Prairies in Western Canada (relatively cold and very dry climate) so my skin forms in about 8-10 minutes, while someone living in a less dry climate may have to wait 30 minutes to an hour.
As a side note, macarons are very finicky with humidity – meaning that if you live in a very humid climate or it is a humid day out, you may have trouble forming the skin, resulting in failed macarons. That being said, macarons are also finicky with excessively dry climates (Because of course they are *eye roll*). My macarons will over-dry and stick to my silicone mats, resulting in lopsided macarons, even if I let them dry for 5 minutes too long! You can tell when they are ready to go when you can delicately touch your finger on the top and they feel dry and your finger does not pick up any batter.
Tip 10) Know your oven: Okay, this is a weird one, and kind of vague, but it is important to know your oven. Does your oven run hot? Cold? Uneven heating? Is the fan overly strong? All of these factors can be the difference between beautiful, perfect macarons and failed macarons. For example, my oven has uneven heating, which led to lopsided macarons, so I have found using my oven on the convection setting produces the best results. It may be annoying, but sometimes you’ll just have to play around with your oven to find the best method and temperature for cooking.
Tip 11) Allow the finished and assembled macarons to sit in the fridge for one to two days before indulging: I know, I know… after you spend a few hours making any delicious pastry, all you want to do is chow down on your edible prize! But I urge you to resist – at least overnight. Waiting allows the macarons and the filling to blend together, bringing together the flavors and textures into one cohesive unit to be eaten. “Un-matured” macarons (freshly iced macarons) tend to fall apart or be too chewy, and are simply messy and not as delicious as matured ones. Lastly, certain fillings mature faster than others. Fillings with high moisture content (think jam, buttercream, custard) tend to mature faster than those with a low moisture content (ex: ganache).
Extra Thoughts Worth Mentioning
• It really is crucial to sift all the dry ingredients – you don’t want macaron tops that are uneven or grainy!
• Ensure the syrup stream is SLOWLY poured onto the side of the stand mixer bowl. You do not want to do this to fast, as it will break the whites and ruin your meringue. You also want to ensure the stream is being poured onto the side of the bowl, otherwise you could get large sugar crystals within your meringue.
• Do not stir the sugar syrup with anything while it is heating up, as this may cause sugar crystals to form – instead just swirl the pot around to mix.
• Consider using a macaron mat, to make piping uniform macarons a breeze!
• Find “perfect pairs” before you start icing, this way you will reduce the number of mismatched pairs, resulting in more perfect macarons!
• Macarons hate too much moisture – so if it’s an excessively humid day, maybe wait until a less humid day!
• If you’re prone to minor hollows, try cooling the macarons upside down once you’ve peeled them off the baking mat.
• Your arm with hurt after the folding process – so worth it though!
Get the Recipe: How to Make Macarons – Easy & Thorough Guide
Ingredients
- 210 g Confectioners Sugar
- 210 g Super Fine Almond Flour
- 150 g Egg Whites,, divided
- 190 g Sugar
- 60 mL Water
- (Optional) Gel Food Coloring
Instructions
Dry Ingredients
- Place almond flour and confectioners sugar into food processor, pulse about 20 times. Sift into bowl large bowl, discarding any large pieces. Do not push large pieces through sifter. Then add 75g of egg whites into the bowl. Thoroughly mix together to form a paste. Feel free to be aggressive with your mixing. When combined, cover and set aside.
Making the Meringue
- Add remaining 75g of egg whites into a stand mixer, and set aside. Meanwhile, add white sugar and water into a small pot, and turn on medium-high. Once mixture heats to 110°C (230°F) turn on stand mixer to high and beat egg whites.
- When sugar mixture reaches 118°C (244°F) and egg whites have reached stiff peaks (but not dry), slowly drizzle the sugar mixture into the beating egg whites, ensuring that the stream is slow and is drizzling down the side of the bowl.
- Continue to beat the meringue until it reaches the ‘bird beak’ stage. Add food coloring, if desired, at this point and quickly mix into meringue, without overmixing.
Macaronage
- Add a large dollop of meringue (about 1/3) into the almond mixture paste. Work meringue dollop into paste to loosen up the paste to make it easier to work with. Do not be afraid of being aggressive at this point, we do not need to worry about knocking the air out of this small amount.
- Add the rest of the meringue into the bowl, and fold it into the paste mixture to combine. Be gentle and careful not to overmix or over-deflate the meringue. The mixture is ready to be piped when it ribbons off your spatula. If it is coming off in large V shaped chunks it still needs to be folded further.
Piping and Drying the Macarons
- Add mixture into a piping bag with medium to large sized round tip. Pipe small circles of batter onto a cookie sheet fitted with a silicone baking mat or parchment paper. Ensure piping bag is held straight up and perpendicular to baking sheet. Using a stencil or a macaron mat makes this process much easier and fool proof, I try to make my macarons around 1½” in diameter.
- Tap the baking sheet multiple times against counter to remove any air bubble from the macarons. If some air bubbles still remain, use a tooth pick to gently poke them out.
- Preheat oven to 300°F, or 275°F for convection oven. While oven is preheating, allow the macarons to sit and form a skin. This skin will ensure the macarons bake up and not out, giving them those classic “feet”. This skin should form anywhere from 8 minutes to an hour. You know the macarons are ready to be baked when you can touch them lightly without having the batter stick to your finger. Keep checking them to see if they have formed a skin– overly dried macarons are just as much of a problem as under-dried macarons!
Baking & Filling
- Bake for 15-20 minutes. Your bake time will depend on the size of your macarons. Check at 15 minutes, and if they are not ready then keep checking every minute. The macarons are ready when the tops are firm and do not move around their base at all.
- Allow the macarons to cool completely before attempting to remove them from the sheets/mats/parchment. When cooled, find “perfect pairs” of macaron halves and set aside to be filled with your choice of filling. After filing, place into the fridge overnight to mature and meld together.


Thank you so much for the detailed instructions to make macrons. This is something my daughter and I have been hesitant to take on but want to tackle it. One question I have is ground almonds. Is that the same as almond flour? I’m looking forward to trying this recipe and how the hot dry desert of Arizona will change these little delights. Thank you again for this recipe. Sincerely yours, Heidi
Yes ground almonds are the same basically! They may be a tad bit coarser so just make sure you sift them properly! Also if you find they do not dry properly due to the heat, you can place them in the fridge for the drying period!
When I add the sugar syrup to the meringue mixture it forms hard candy like sugar. Why?
Are you pouring down the side of the bowl and not directly into the meringue? Also are you drizzling it in very slowly? If you pour directly into the egg whites it may cause a hard sugar to form, and if you are pouring the syrup in too fast it’ll also harden together. Lastly, if the temperature of the syrup gets too high (beyond 118C) the syrup is more likely to crystallize once it hits the cold egg whites. Those are the only three reasons I can think of. Let me know if you have any further questions.
Thats such a great and detailed how to! All the macarons recipes I tried always ended uo as something else and not as macaroons. I will definitely try out your recipe! Nina
Thank you, Nina!
I didn’t get to bird peak stage. My meringue was runny. Did I overmix my egg whites while my sugar water was heating? Did I not add it slowly enough to my mixer? I’m going to try again. I cleaned my bowl and whisk attachment with alcohol. I haven’t ever done that before. Could I not be using the right alcohol?
Did your whites get to a stiff peak before you added the sugar syrup? Usually a runny meringue means that the whites weren’t whipped enough before you added the sugar syrup.
They did. I think they got too stiff. Maybe dry like you mentioned in the directions.
I was going to buy a silicone mat for uniform Macarons and was told that the macaron gets mushy from the mat. What is your advice? Thank you
Hi there,
I’ve never had issues with them getting mushy on silicone mats! I’ve only ever used silicone mats and have never experienced that. The only thing that is important to note is that you need to make sure that the macarons are completely cooled before trying to peel them off the mat, otherwise some of the cookie will stick.
Hi Amie! I just made my first batch and was so excited when I put my first sheet of them in the oven and they turned out perfect. Then my second sheet I put sprinkles on and I put in them in the oven after the first half came out and all of them turned out domes. The first half of the batch turned out perfect. But I have no clue why the other half didn’t work right. Any ideas??
Hi Molly! Macarons are so so finicky! I’m sorry this happened to you! My guess would be that they over-dried because they sat for too long. This can sometimes happen depending on the humidity in your house and the humidity of the climate you’re in! Next time try piping each sheet as you go – so pipe the first sheet, let it dry, then pop in the oven. While that batch is baking in the oven, pipe your next sheet and let it dry – this way the second sheet isn’t sitting as long and therefore over-drying!
What do you do with the dough while waiting to pipe, room temperature or refrigeration while waiting to pipe.
Thanks ivy
I would add all of the batter to a large piping bag, then keep it at room temperature between piping! If it’s really hot in your house (above typical room temp) I would maybe suggest to keep it in your fridge, but it might be a bit harder to pipe
Love the recipe! But when would I add the coloring?
You can add the food colouring to either the finished meringue or to the paste you made with the almonds+egg whites!
Is ground almonds the same as almond flour or do you grind the almonds your self?
It’s the same!
These were great!! I’ve tried making macarons before but they’ve never turned out as great as this recipe! Thx!
Thank you!
What would you change ( time or temps etc.) if you were to double the recipe? Thank you!!!
You could increase temperature by 10 degrees Fahrenheit. As for time, I would just keep an eye on them when they’re nearing the end baking time to see if more time is needed.
You could also bake in batches. So when I make large batches, I typically pipe half of it out, let them dry, and then bake. While that set is baking, I pipe out and dry the next batch.
When should I add the flavoring to macaron portion? I have a lavender paste that I would like to use.
Hi there! The flavoring can be added when the meringue is basically finished whipping, or it can also be added to the almond/sugar/egg paste that is created at the beginning!
How much flavoring do you suggest using? I have tried to make these twice using another recipe with no success. Tried your recipe tonight and they turned out perfectly! Thank you!
I’m so glad they turned out for you!! I would suggest using a tsp of liquid flavor, such as vanilla extract. If using powder flavor, such as ground freeze dried fruit or cocoa powder, I would use up to 20g, while reducing both the almond flour by 10g and the confectioners sugar by 10g
I’m making macarons for my wedding. Can I freeze/thaw them? If I csn freeze them do I make the completed cookie first and freeze or freeze just the macarons, thaw, then add the filling?
Hi there! The best way is to freeze the unfilled macarons!
Hi Amie, I just tried making your macaron recipe, and the only change I did was I made the shells chocolate so I went to your Nutella macaron recipe and used the 20g of cocoa for THIS recipe. Practically all my shells are cracked/domed. What did I do wrong? 😅
Hi Emily! Cracked shells typically happen because you didn’t let them rest and form a skin long enough! It can also be caused by improper macaronage that left too much air in your batter (undermixed0!
If I wanted to make strawberry macarons when would I add the ground freeze dried strawberries and would I change the amounts of other ingredients?
Yes, ground freeze dried strawberries would be the way to go! I would do the ingredients as followed: 200g Confectioners Sugar, 200g Almond Flour, 20g Freeze Dried Strawberries
Pingback: How to Make Macarons – Easy & Thorough Guide – Recipe m@C
Hi! Which temperature do you recomend for the convection oven?? Tks!
275F ☺️
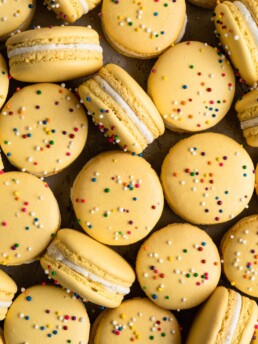
Hello! At what point did you add the decorative sprinkles? Thanks!!
After you’ve piped them, and tapped the pans to remove the air bubbles!
Best macaron recipe I’ve tried! They had perfect feet and no hollows
Do you suggest ground freeze dried fruit to flavor or liquid flavoring?
Either works! I’ve used both with success, just stay away from oil based flavors! I would suggest using a tsp of liquid flavor, such as vanilla extract. If using powder flavor, such as ground freeze dried fruit or cocoa powder, I would use up to 20g, while reducing both the almond flour by 10g and the confectioners sugar by 10g
Pingback: Cooking With Camille – Macarons – Gummibunny
Thank you for a comprehensive article — I do have one question about the egg whites. Each recipe I’ve read gives the weight needed to make the macaron so is it the total weight before or after it’s been aged? I’m not sure if I age more egg whites than what’s called for so that the aged weight is what I’m using.
I do the weight of the aged egg whites. So age more egg whites than you need. I typically age one extra egg white, then weight out what you need right before you begin making the macarons.
I tried the Italian meringue method today and had a much better result than I did with the French — the batter was more stable and I had a better piping result. You weren’t wrong about the arm soreness during folding! I did include one more egg white for aging than I thought I’d need (as you suggested) and it was a perfect end weight. I over mixed my egg whites though when I went to check the temp on the sugar syrup so the macarons had a slightly hollow top — still delicious though! I added a little lemon juice, zest and yellow food color to step 1 so it had a nice light lemon flavor. Thank you for a great recipe Amie!
Sounds delicious! I’m so glad you enjoyed the recipe!
Hey Amie! I made this recipe for the first time this past weekend (in humid Houston) and they turned out awesome!! I’m so grateful and excited. Just wondering how you would suggest flavoring if I was going to use emulsion? I’ve seen some ladies put a few drops on their spatula when they begin to fold. Does that seem right to you?
Yay! I’m so glad they worked out for you! I would probably add the emulsion to the almond flour/confectioners sugar/egg white paste you make at the beginning! Try to keep the amount added to 1 tsp or less though. If you’re looking for more flavor after, you definitely have a lot more leeway with adding the flavor to whatever filling you’re using!
Is there any type of flour I can use besides almond flour? I’m allergic to certain nuts.
I have never tried anything other than almond flour, as it is traditional to macarons, however I have seen recipes that make nut-free macarons with ground raw pumpkin seeds or ground raw sunflower seeds.
You can use buckwheat flour! I did maple and banana flavors with these and they were delicious!
Thanks for the suggestion!
Do you happen to have a video on how you make the italian method? I’m more of a visual learner so videos help alot.
Here is a great video on making macarons
How far in advance can I make them?
They can be made 3 days in advance. Alternatively, you can also pre-make the shells and freeze them unfilled if you wanted to make them further in advance.
Hi! It’s my first time doing macarons and after reviewing a few recipes I decided to go with yours. Although they taste great, they are all flat, and some cracked in the oven. I know it will take a long way to the perfect macaron, but what did I do wrong? Thanks
Hi there! It sounds like they didn’t dry enough in the resting stage. Do you live in a hot/humid climate? Humid climates (especially during summer) are terrible for macarons! You can try drying them in the fridge to remove some of the moisture.
Hi, thank you for the recipe. However I am having a hard time getting the Italian merenge for the macarons right. I have followed the instructions step by step in several different recipes for Italian Macarons and I come across the same problem on each recipe. I just can not get the merenge to stiff properly, I end up with a runny silky white merenge that looks and almost tastes like melted marshmallows. Please help me understand what am I doing wrong. I am using a stand mixer, with a steel bowl, all my utensils are clean.
Please advise,
Thank you
Nayeli
Hi there! Are you beating your egg whites to stiff peaks before adding the hot sugar syrup? That is most common problem with loose meringues. If everything fails you, you may want to try the Swiss method for meringue, which involves heating the sugar and egg whites over a Bain Marie until the sugar fully dissolves, then placing it on the stand mixer to beat to stiff peaks.
I just cannot make Italian macarons without them all coming out lopsided … all of them eeek help!
Hi there! Lopsided macarons can be caused by a ton of different things. Possible hot spots in your oven, your oven fan being to forceful, not piping perfectly perpendicular. Also I have sometimes seen that the silicone mats can sometimes be too sticky – try using parchment paper instead and see if the helps too.
this was a outstanding reipe to bake,it defenatly extends off of other macoroon recipes.
Hello! Just wondering is this recipe enough to make 2 dozen macarons? Thank you for the information!
Yes! It should make about 25 macarons!
Thank you! Im very excited to try it out 🙂
My niece loves macarons! Since I seem to be the baker in the family I gave these a try- I followed all the tips & tricks and they turned out perfect! My niece lives 500+ miles away in the mountains and shipping isn’t really an option. Next time I am there to visit I would love to make these with her. Do you have any tips/tricks/advice for making these in high altitude (about 7,000 ft above sea level)?
Thank you! I’m so glad that they worked out for you! As for high elevation baking I can’t be of much help! I live at a pretty low elevation and have really only ever had experience baking here. I did some reading online and some people suggested adding powdered egg whites to the meringue.. so maybe that could help!
Hi Amie! Thank you for my now go to recipe! I was wondering if you have used dried spices, like cinnamon, nutmeg etc in the shells. Do you have an amount that you suggest?
Yes I have! I would use 1 tsp of cinnamon, and probably 1/8 tsp nutmeg! You can also sprinkle cinnamon on top of the (still wet) piped shells.
I live in Colorado at 7700 feet altitude. Would I need to make any adjustments like I do to practically every other thing?
I’m not entirely sure for macarons as I haven’t baked them at a high altitude before! I read that adding a bit of meringue powder into the eggs whites can help! Sorry I couldn’t be of more help!
Made these twice. First time I made them using silpat sheets and by putting 2 trays in at a time. They stuck to the sheets. The top batch cooked fine, but the lower rack was domed. Second time I put on parchment paper one batch at a time. Perfection!
Love this!!
This recipe is marvelous! I’ve tried several macaron recipes and this one is by far the best one I’ve tried!(all the others failed) Thank you for all of your tips; this will from now on be my permanent recipe!
Hi, Amie!
I loved your recipe and gave it a try. However, my almond flour, sugar and egg whites mixture turned into a very thick paste. It was impossible to mix in the meringue properly. It was just too thick. Do you have any idea where I wwnt wrong?
Thank you!
Hi! I’m sorry that happened! The mixture should be quite thick, but not unworkable. Did you weigh everything out exactly?
Also, did you mature the egg whites? If yes, they could of possibly lost too much moisture depending on climate. You could try not maturing them next time (if you think that was the culprit!)
Hello!
I tried this recipe and they were 👌🏻. Can this recipe be doubled ? Or would the ratios need to change to double the recipe?
it can be doubled!
What is your favorite gel food coloring to use?
I like Americolor or ChefMaster!
Amie,
Ok… last year I must have made dozens of batches of Macrons. French, Italian, Swiss… all of them. All but one, the first one of course, turned out less than perfect, some horrible.
I swore off the dreaded, miscreant, soul sucking, little *@#$ for life! They’re like a gorgeous guy…all show – no substance.
The other day I made Crème Burlee and didn’t have enough egg whites left over for an Angel food cake. Looking for some other use and going through my pantry I realized I have some Almond flour that I should use up, so I find myself here again!
I read all you tips and I can honestly say they are not new to me – I have incorporated them all before, sans the aging the egg whites, which I am doing as I write.
With that said, I am going to give them one last try (that’s probably a lie) and I am hoping, against all hope, that this time it works.
As an aside, in the past of have used the recipes and tips from the Preppy Kitchen, Sally’s Baking Addiction, Food Network, and a ton more, some of them multiply times. I chose to use yours because your macrons look beautiful!
Fingers Crossed… and I will let you know!
I will let you know tomorrow how they turn out… fingers crossed.
I feel your pain!! For years these cookies also sucked the life out of me 😂 I really hope they turned out for you!