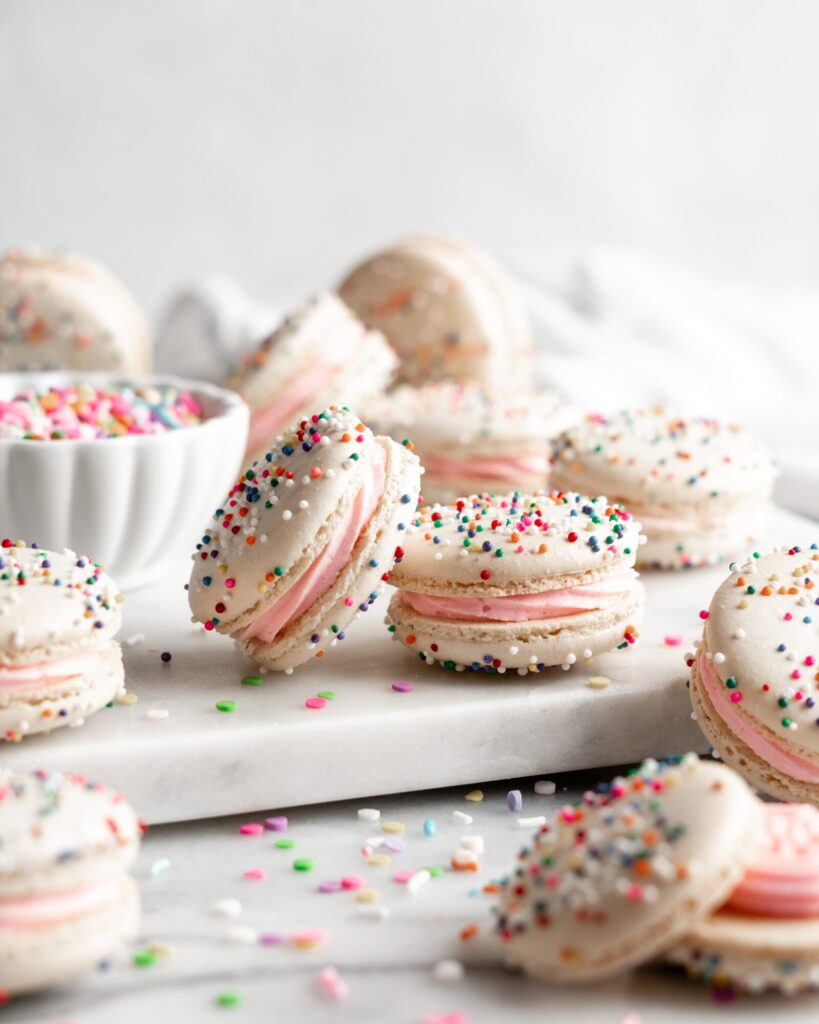
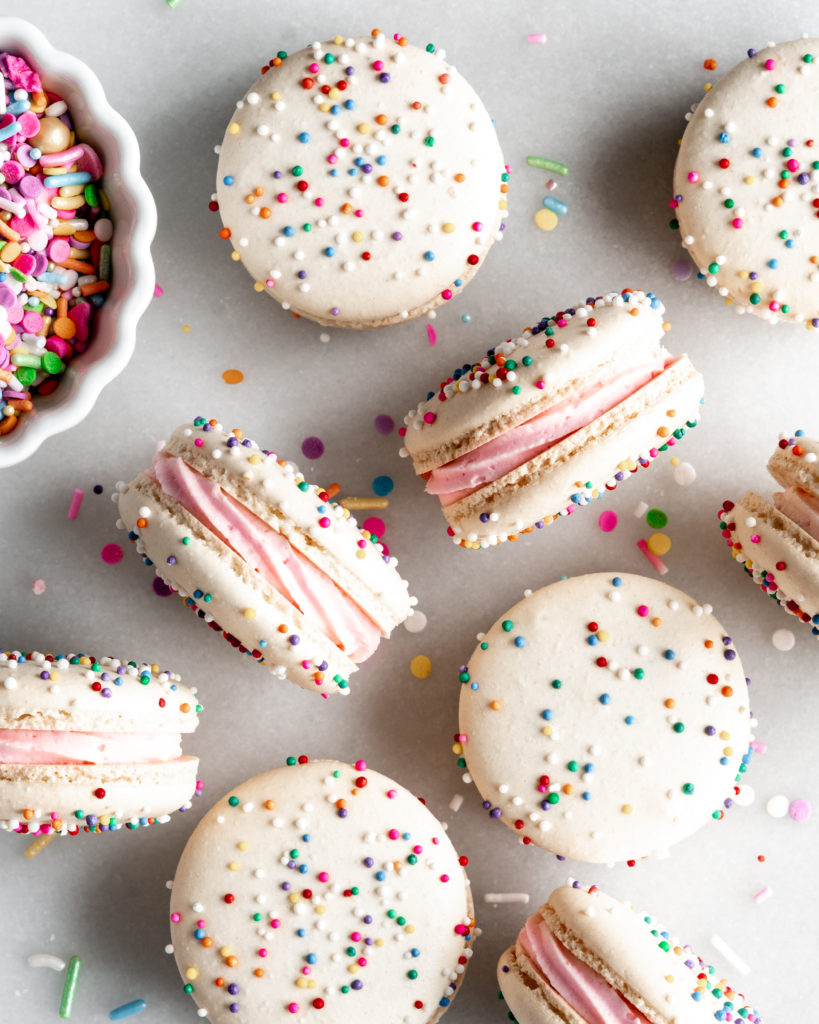
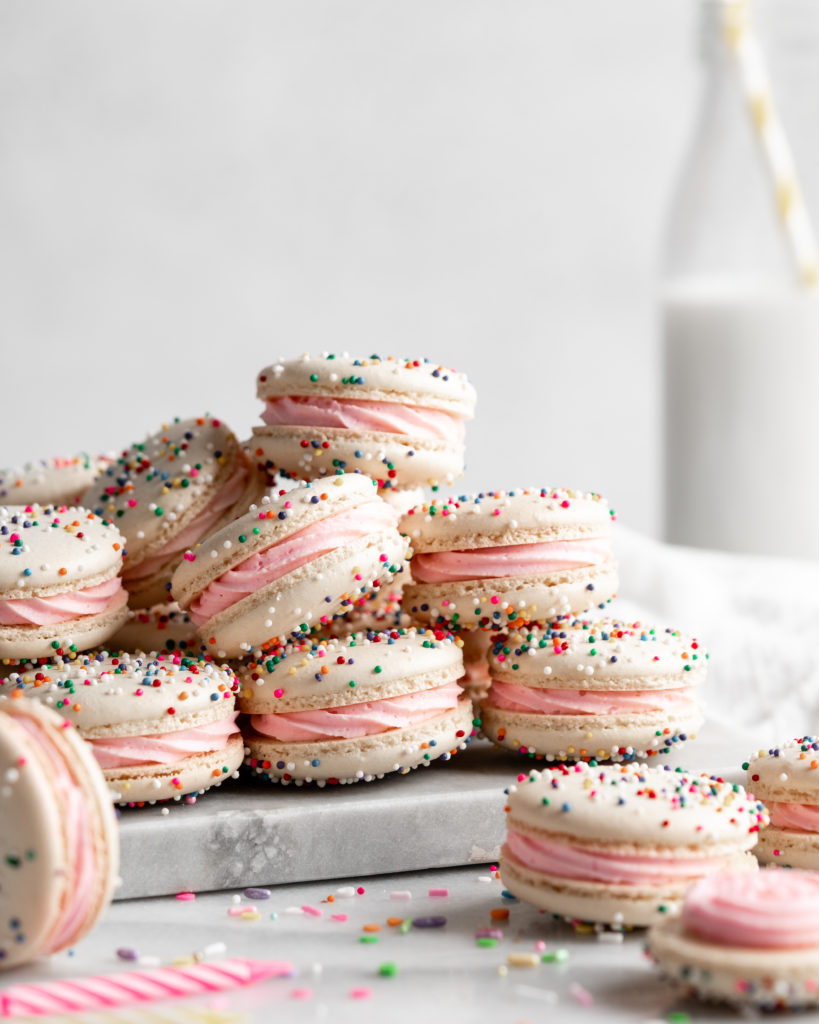
Birthday Cake Macarons
These brightly speckled birthday cake macaron are full of delicious, classic birthday cake flavor! They feature a vanilla flavored macaron shell that is filled with a buttercream that has been infused with boxed birthday cake mix! Fun, colorful, and full of delicious nostalgic flavor!
Ingredients
Almond Flour: I like to use ones labelled superfine almond flour – that way you’ll have the smoothest macaron shells!
Egg Whites: These have to be fresh egg whites, not the ones from the cartons (the carton ones wont whip up into a meringue).
Sugar: Just basic refined white sugar is best! I have used maple sugar (not syrup) with success, however, it will add a maple flavor to the macarons.
Confectioners Sugar: Just the good ol’ basic confectioners sugar!
White or Yellow Cake Mix: The cake mix is heat-treated in the microwave and then added to the buttercream filling. This achieves that classic birthday cake flavor for the macarons!
Butter: Can’t have a buttercream filling without butter!
Artificial Vanilla: I like to use artificial vanilla because it gives that classic birthday cake flavor better than real vanilla does. However, feel free to use real vanilla if that’s what you have!
SWISS MERINGUE MACARON METHOD
Many of you may know me from my How to Make Macarons: A Step by Step Guide + Tips/Tricks guide. That guide, and recipe, uses the Italian Method for making macarons, mainly due to it’s superior stability compared to the French method. Another amazing method for making macarons is Swiss Meringue Method Macarons! I have used that method to make these Birthday Cake Macarons!
The swiss method for macarons has all the great benefits of the Italian method – mainly that the meringue is quite stable and easier to work with, while eliminating the lengthy process! That’s right, the Swiss method is easier and faster than the Italian method for macarons!
The Swiss meringue method for macarons involves heating the egg whites and sugar over a bain marie until it reaches the proper temperature. The hot egg whites and sugar are then beaten into a stiff meringue. Finally combined confectioners sugar and almond flour are folded in during the macaronage process!
TIPS & TRICKS FOR SWISS MERINGUE MACARONS
I have included some of my old, still relevant tips & tricks, as well as some new ones specifically for the swiss meringue macaron method. These tips and tricks will increase your success in making perfect Birthday Cake Macarons!
TIP 1) USE A FOOD SCALE AND WEIGH EVERYTHING OUT
As with the Italian method, it is critical that you measure out your macaron ingredients by weight! Macarons have a very low tolerance for error. Volumetric measurement can result in a HUGE variance in the amount of ingredient used. So for something as finnicky as macarons, it is better to be precise, down to the exact gram, with the measurements.
TIP 2) WIPE ALL UTENSILS/BOWLS/APPARATUS WITH VODKA OR VINEGAR
Wipe anything that will be coming into contact with the egg whites with vodka or vinegar. This is to ensure no oil residue is present that would ruin your meringue!
TIP 3) USE EGG WHITE POWDER
I found adding egg white powder to the eggs and sugar made for PERFECT macarons! If you ever struggle with hollows – this is the trick for you!
TIP 4) BEAT MERINGUE TO STIFF PEAKS:
I have found the Swiss meringue macaron method requires the meringue to be beaten to stiff peaks. Stiff peaks means the meringue completely holds it’s shape and stands up straight when you lift the beater up. When looking in the bowl, the meringue should also be gathering inside the whip attachment. The best and most stable way to achieve stiff peaks is to start the beater on medium-low and beat until soft peaks, then increase to medium and beat until medium peaks, then finally increase to high and beat until stiff peaks!
TIP 5) STOP FOLDING ONCE THE BATTER ‘RIBBONS’
When the macaronage process is complete, the batter should flow like lava, and ribbon off your spatula. If it falls off in chunks it is under-mixed, and if it runs right off the spatula without ribboning, it is over-mixed! The ‘ribbons’ of batter should disappear completely into the rest of the other batter within 30 seconds.
TIP 6) TAP THE PAN AND REMOVE AIR BUBBLES
Smack the pan against counter, rotate 90° and smack again, continue until all sides have been smacked. Alternatively, lift the pan up and drop it down onto the counter a few times. This has two purposes, the first being that is causes any air bubbles in the macarons to rise to the surface and pop – resulting in smoother and more stable macarons, and the second being that it causes the batter to flatten out along with any humps left over from piping. I usually smack mine more than 4 times. I just do it until I feel like all the air bubbles have surfaced and the batter has flattened nicely.
TIP 7) USE A TOOTHPICK TO ‘POP’ ANY REMAINING AIR BUBBLES
Get up close and personal with your beautifully piped little macs and look for any remaining air bubbles. You are looking for any obvious ones, but also some hidden ones that may just look like a very slight irregularity on the surface, or even a tiny bump. Then use a toothpick and simply pop them, and lightly use the toothpick to swirl batter to fill the hole. I find if I skip this step I can sometimes be left with hollow macarons, so it is definitely important!
TIP 8) ALLOW THE MACARONS TO FORM A “SKIN”
This is crucial – I repeat THIS IS CRUCIAL. Do not skip this step whatever you do! This step allows the macarons to rise vertically and reduces the amount that it will spread out horizontally, leading to the oh-so-perfect little feet we’re after! The skin will form faster in cold dry climates, and conversely will take longer to form in hot humid climates. I live in the Prairies in Western Canada (relatively cold and very dry climate) so my skin forms in about 8-10 minutes, while someone living in a less dry climate may have to wait 30 minutes to an hour.
As a side note, macarons are very finicky with humidity – meaning that if you live in a very humid climate or it is a humid day out, you may have trouble forming the skin, resulting in failed macarons. That being said, macarons are also finicky with excessively dry climates (Because of course they are *eye roll*). My macarons will over-dry and stick to my silicone mats, resulting in lopsided macarons, even if I let them dry for 5 minutes too long! You can tell when they are ready to go when you can delicately touch your finger on the top and they feel dry and your finger does not pick up any batter.
TIP 9) KNOW YOUR OVEN
Okay, this is a weird one, and kind of vague, but it is important to know your oven. Does your oven run hot? Cold? Uneven heating? Is the fan overly strong? All of these factors can be the difference between beautiful, perfect macarons and failed macarons. It may be annoying, but sometimes you’ll just have to play around with your oven to find the best method and temperature for cooking.
TIP 10) FIND ‘PERFECT PAIRS’ BEFORE FILLING
Lets face it, we’re not all master macaron makers, and our macaron shells are most likely going to have slight variations in sizes. For this reason, it is important to find ‘perfect pairs’, meaning 2 macaron shells that are the same size, before you begin filling and sandwiching. There’s nothing worse than being left with a bunch of mismatched macaron shells!
Heat treating the boxed cake mix
Making the buttercream filling for these birthday cake macarons is very straight-forward, except that we have to heat-treat the boxed cake mix before we add it to the buttercream. The boxed cake mix has both raw egg powder and raw flour in it, meaning there’s a risk for salmonella contamination. But do not fear, because heat-treating the boxed cake is super simple!
Just throw the 1 cup of cake mix into a microwave-safe bowl. Place the bowl into the microwave for around 1 minute and 30 seconds, or until it reaches 170°F. I like to stir the cake mix every 30 seconds – just to promote even heating! After it reaches that 170°F, remove it from the microwave and allow it to cool for 5 to 10 minutes before you start making the birthday cake buttercream.
Recipe Acknowledgement
This recipe used Swiss method for its macaron shells. The base Swiss meringue macaron recipe was created by Camila at Pie and Tacos. Check out her website for a ton more macarons!
PRODUCTS & EQUIPMENT I USED FOR THE Birthday Cake MACARONS
Note, these links are all affiliate links with amazon – simply meaning that I make a small commission off them if you purchase them!
My preferred pan is this USA Pan Cookie Pan – This pan is sturdy and warp-resistant. As well, these pans circulate air better, meaning you’re less likely to have issues with lop-sidedness.
These are my favorite silicone mats for macarons! I find they have perfect spacing, and the guide size creates the perfect macaron size (not too big or too small!).
This is the almond flour I like to use! It is very finely ground, meaning that your birthday cake macaron shells will be smoother!

Get the Recipe: Birthday Cake Macarons
Ingredients
Birthday Cake Macarons
- 105 g Sifted Super Fine Almond Flour
- 105 g Sifted Confectioners Sugar
- 100 g Egg Whites
- 100 g White Sugar
- 3 g (1 tsp) Egg White Powder,, otherwise known as meringue powder (optional but highly recommended)
- 1 tsp Artificial Vanilla
- Nonpareils Rainbow Sprinkles
Birthday Cake Buttercream
- 1 cup (130g) White or Yellow Boxed Cake Mix
- 1 cup (227g) Unsalted Butter,, at room temperature
- 3 cups (360g) Confectioners Sugar
- 2 tbsp (28g) Heavy Cream
- 1 tsp Artificial Vanilla
- Pink Food Colouring
Equipment
- Stand mixer
Instructions
Dry Ingredients
- Prepare a baking sheet with parchment or silicone mat (if you have enough, prepare 2 baking sheets).
- Over a large mixing bowl on a scale, sift almond flour until you reach 105g. Discard any large pieces of almond flour. Repeat with the confectioners sugar. Whisk the almond flour and confectioners sugar until very well-combined. Set aside.
Making the Meringue
- Add egg whites, white sugar, and egg white powder to the bowl of your stand mixer, and whisk together. Place the bowl over top of a simmering pot of water (bain-marie), ensuring a tight seal and ensuring that the bottom of the stand mixer bowl is not actually touching the water.
- Continuously whisk the mixture while it heats up over the bain-marie, heat the mixture until it reaches 140°F (60°C). When temperature is achieved, remove the bowl from the simmering water pot and place onto your stand mixer, fitted with the whip attachment.
- Beat the mixture, starting on low. Once soft peaks have been formed, increase the speed to medium. Once medium peaks are achieved, increase the speed to high. Beat on high until stiff peaks have formed. Add in the vanilla, and beat until just combined.
Macaronage
- Remove the bowl from the stand mixer, and place a sieve over top. Pour the dry mixture into the sieve, then sift the dry ingredients into the meringue.
- Fold the dry ingredients into the meringue. I like to scrape around the sides of the bowl in an entire circle, and then cut through the centre – similar to the Greek letter phi which looks like this: Φ
- Be gentle and careful not to overmix or over-deflate the meringue. The mixture is ready to be piped when it ribbons off your spatula, meaning that the batter, when lifted with a spatula, should keep flowing off the spatula in ribbon shapes nonstop, without drizzling off too quickly. If it is coming off in large V shaped chunks it still needs to be folded further. Another test is the figure 8 test: If you can lift some batter up and use it to draw several figure 8’s without the stream breaking, it is ready!
Piping and Drying the Macarons
- Add mixture into a piping bag with medium sized round tip. Pipe small circles of batter onto a cookie sheet fitted with a silicone baking mat or parchment paper. Ensure piping bag is held straight up and perpendicular to baking sheet. Using a stencil or a macaron mat makes this process much easier and fool proof, I try to make my macarons around 1½” in diameter.
- Tap the baking sheet multiple times against counter to remove any air bubble from the macarons. If some air bubbles still remain, use a tooth pick to gently poke them out. Sprinkle the macarons with the rainbow sprinkles.
- Preheat oven to 300°F, or 275°F for convection oven. While oven is preheating, allow the macarons to sit and form a skin. This skin will ensure the macarons bake up and not out, giving them those classic “feet”. This skin should form anywhere from 8 minutes to an hour. You know the macarons are ready to be baked when you can touch them lightly without having the batter stick to your finger. Keep checking them to see if they have formed a skin– overly dried macarons are just as much of a problem as under-dried macarons!
Baking
- Bake for 15-20 minutes. Your bake time will depend on the size of your macarons. Check at 15 minutes, and if they are not ready then keep checking every minute. The macarons are ready when the tops are firm and do not move around their base at all.
- Allow the macarons to cool completely before attempting to remove them from the sheets/mats/parchment. When cooled, find “perfect pairs” of macaron halves and set aside to be filled.
Birthday Cake Buttercream
- Add the boxed cake mix to a microwave safe bowl. Microwave for about 1 minute and 30 seconds, stirring every 30 second interval, until the cake mix reaches 170°F. Set aside to cool for 10 minutes.
- Add the butter to your stand mixer fitted with the whip attachment. Beat until light and fluffy – about 3 minutes. Add in the cooled cake mix and confectioners sugar in intervals, until very well combined and smooth.
- Finish by adding the cream, vanilla, and food colouring, until well-combined. Add to a piping bag fitted with a star tip.
Assembling the Macarons
- Pipe the birthday cake buttercream onto ½ of the macaron shells (bottoms of perfect pairs), then top each bottom with it’s corresponding top. Place into the fridge overnight to mature and meld together.
Recipe adapted from Pies and Tacos

Do you prepare the cake mix or put it in the microwave as powder?
As powder! It’s to heat it to make it safe to consume.