No Bake Strawberry Crunch Cheesecake Waffle Cones
These Strawberry Crunch Cheesecake Cones have a deliciously crunchy exterior, while having a silky smooth strawberry cheesecake filling. The filling is perfectly sweet, rich, and creamy. The ultimate summer treat for those Strawberry Cheesecake lovers out there!

Table of Contents
- Why you’ll love this recipe
- Ingredient notes
- How to make the Strawberry Crunch Cheesecake Cones
- Tips & tricks
- Equipment required
- Storing the Cheesecake Cones
- FAQ
- Variations
- Related recipes
Why you’ll love this recipe
It is a no-bake cheesecake cone recipe – meaning you can enjoy cheesecake in the summer without turning your oven on!
It is an easy individual treat. The Strawberry crunch cheesecake cones make perfect individual portions that do not require any utensils to eat.
Strawberry cheesecake cones are perfect for birthdays or events, and are great for kids and adults alike.
Ingredient notes
Strawberry Jello: Strawberry jello is used for the strawberry crunch topping portion of these cheesecake cones.
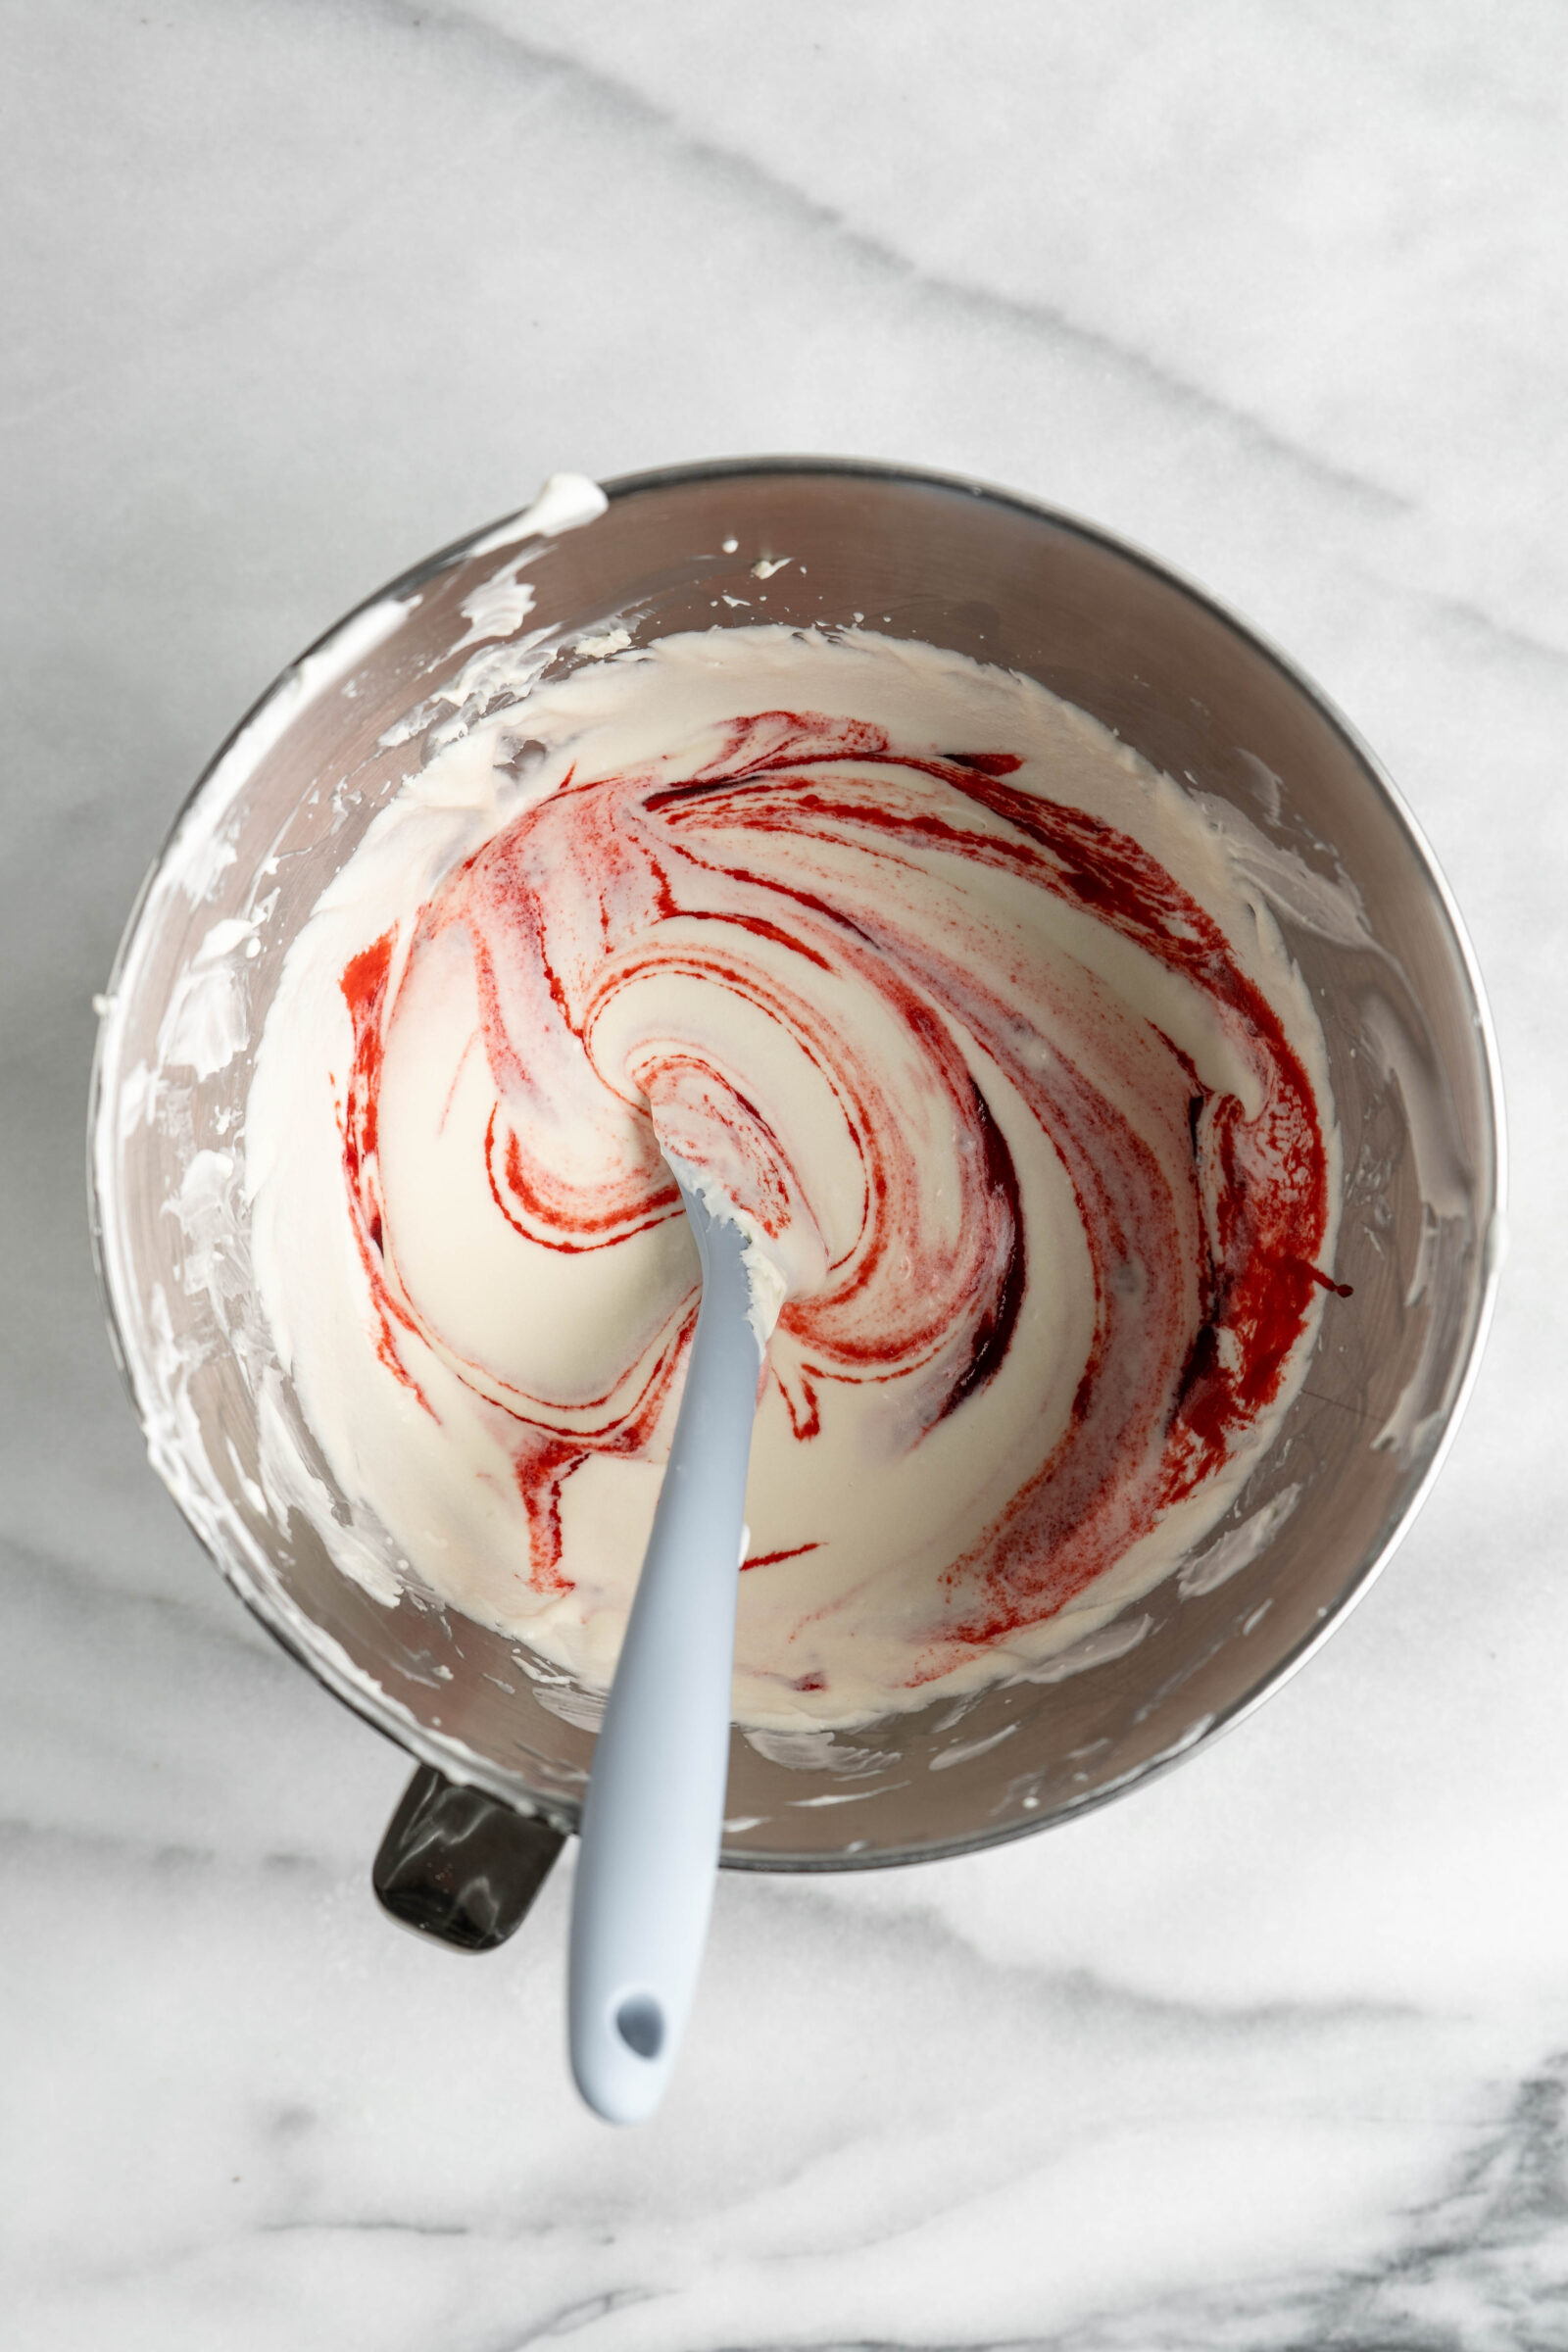
Strawberry Jam: Strawberry jam is used in the cheesecake filling, giving some extra strawberry flavor.
White Chocolate: I like to use a high-quality white chocolate that is creamy and less “artificial tasting”. I like Lindt, but any is fine.
Waffle Cones: The king of all ice cream cones!
Cream Cheese: High quality cream cheese is best! I use Philadelphia cream cheese for these cheesecake cones.

How to make the Strawberry Crunch Cheesecake Cones
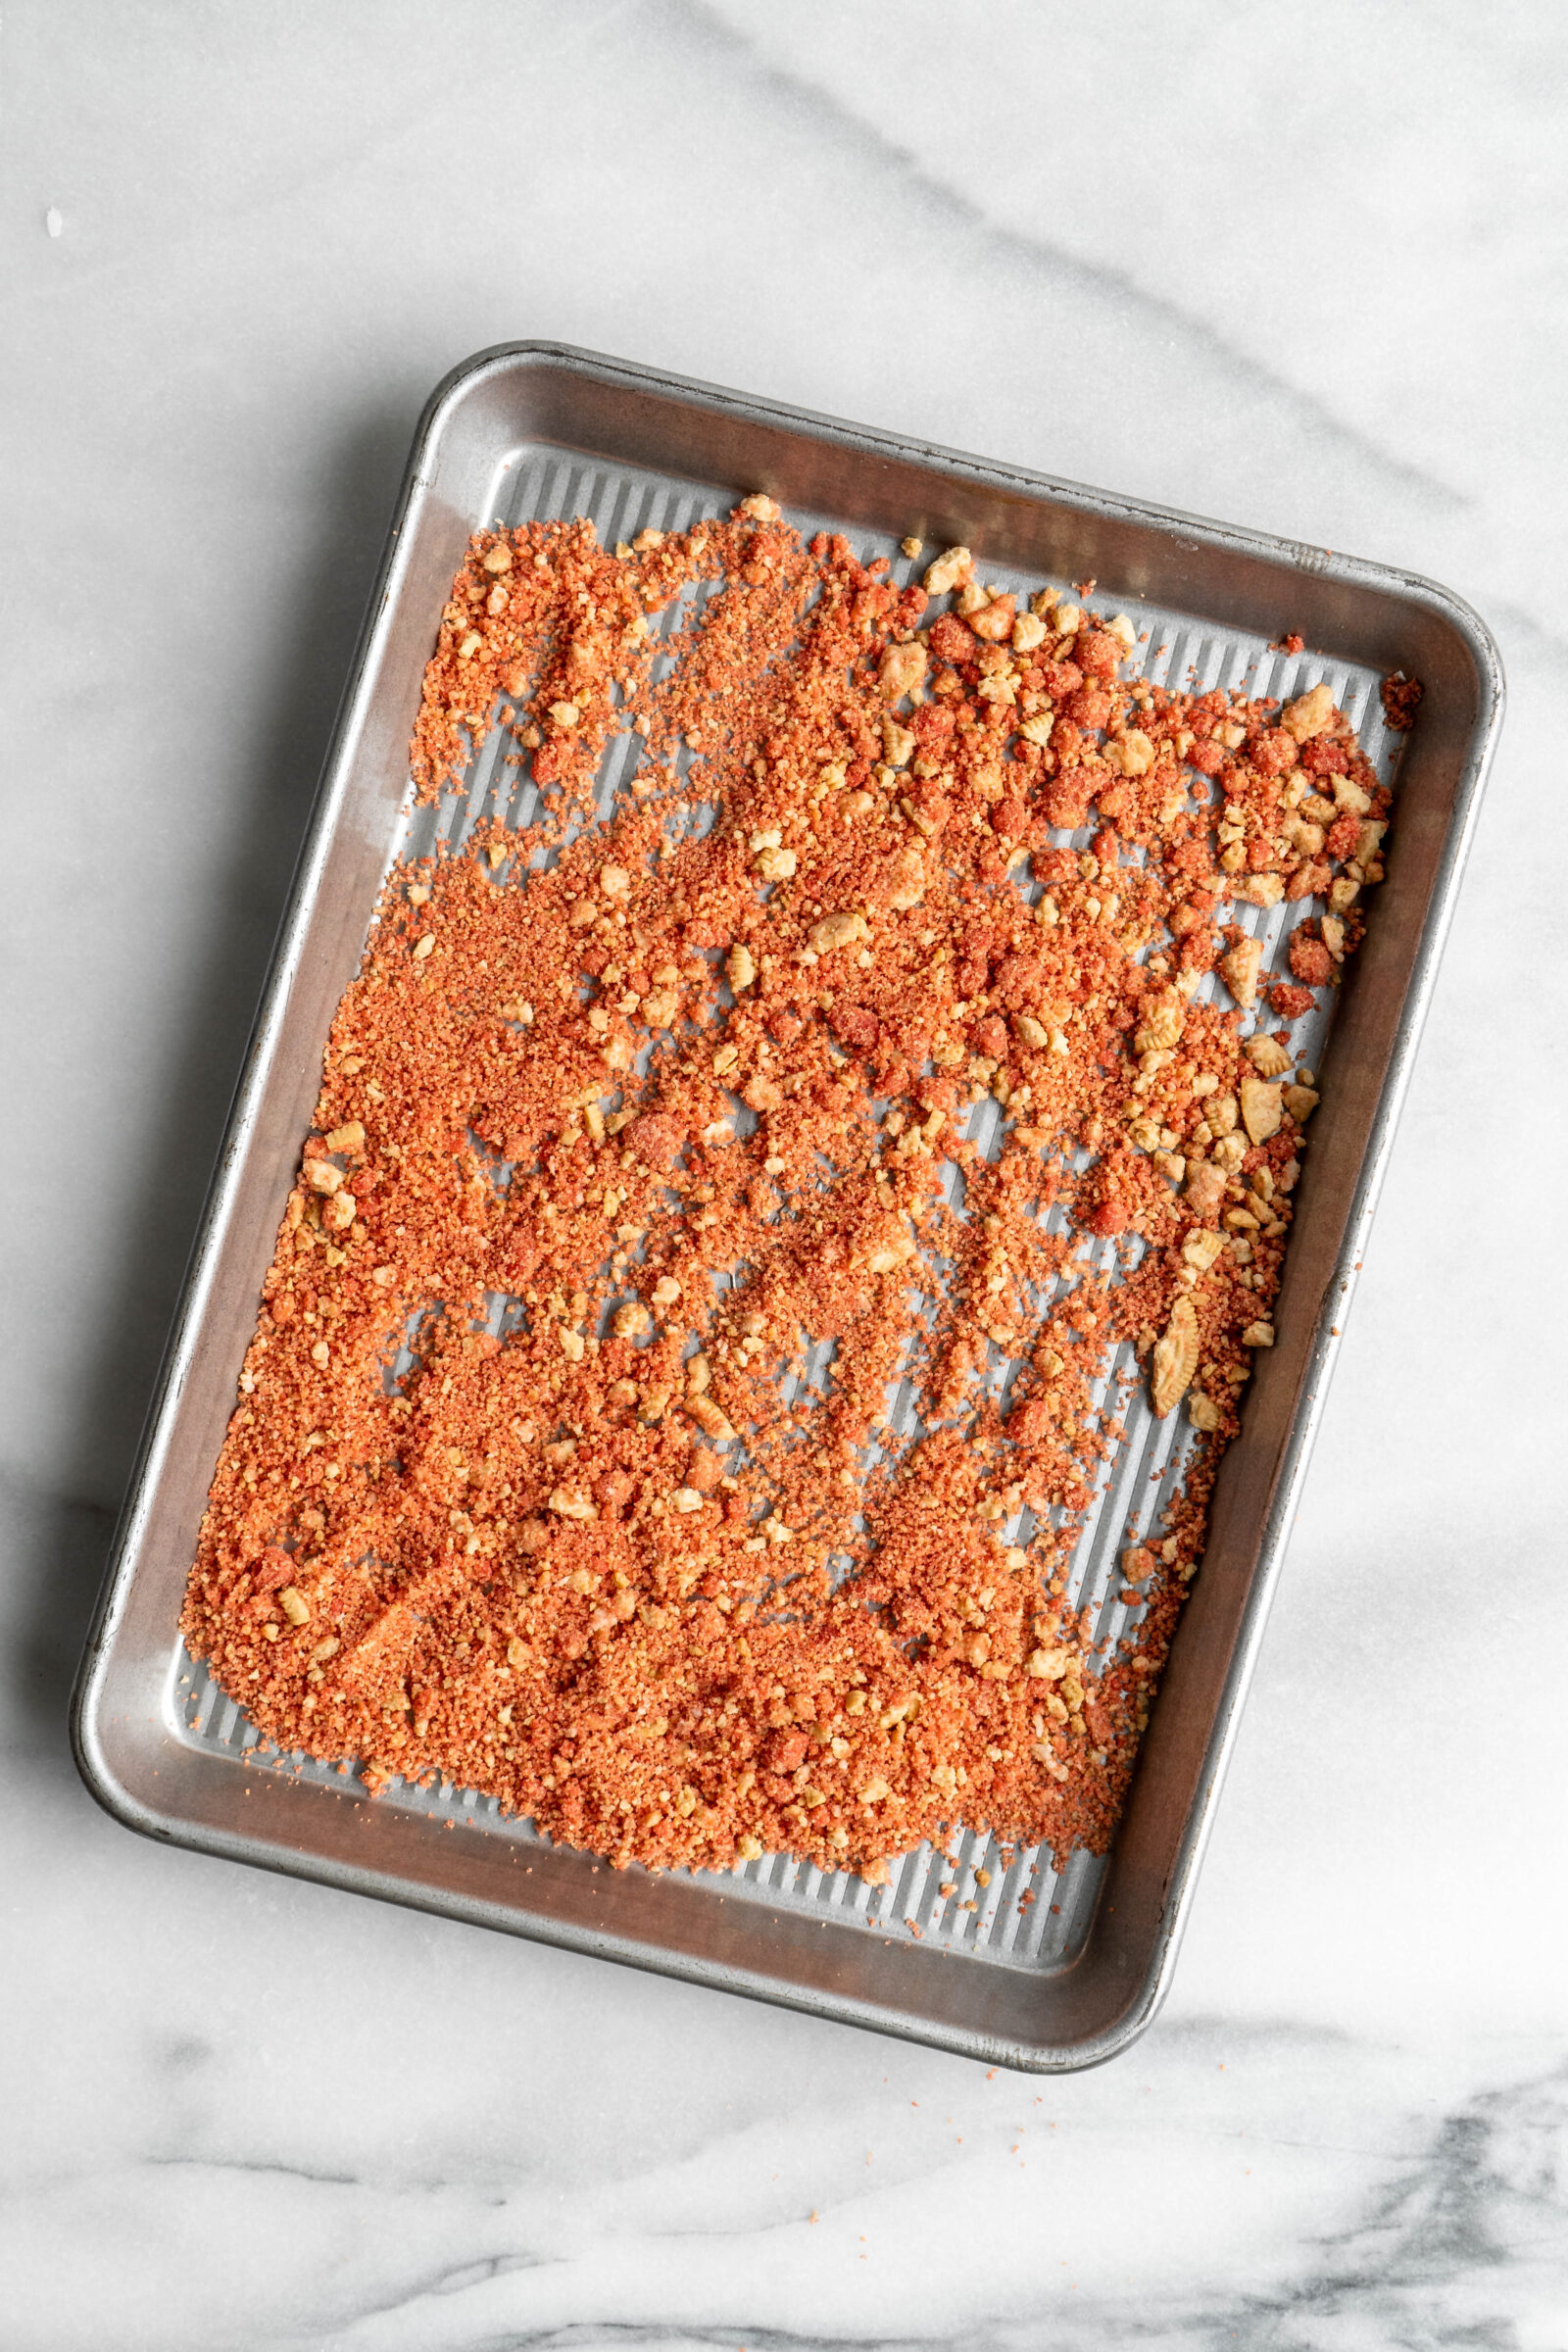
1. Make strawberry crunch: Add oreos to a food processor and grind until they are a wet-sand like texture. Add in melted butter and jello, then pulse until dispersed.
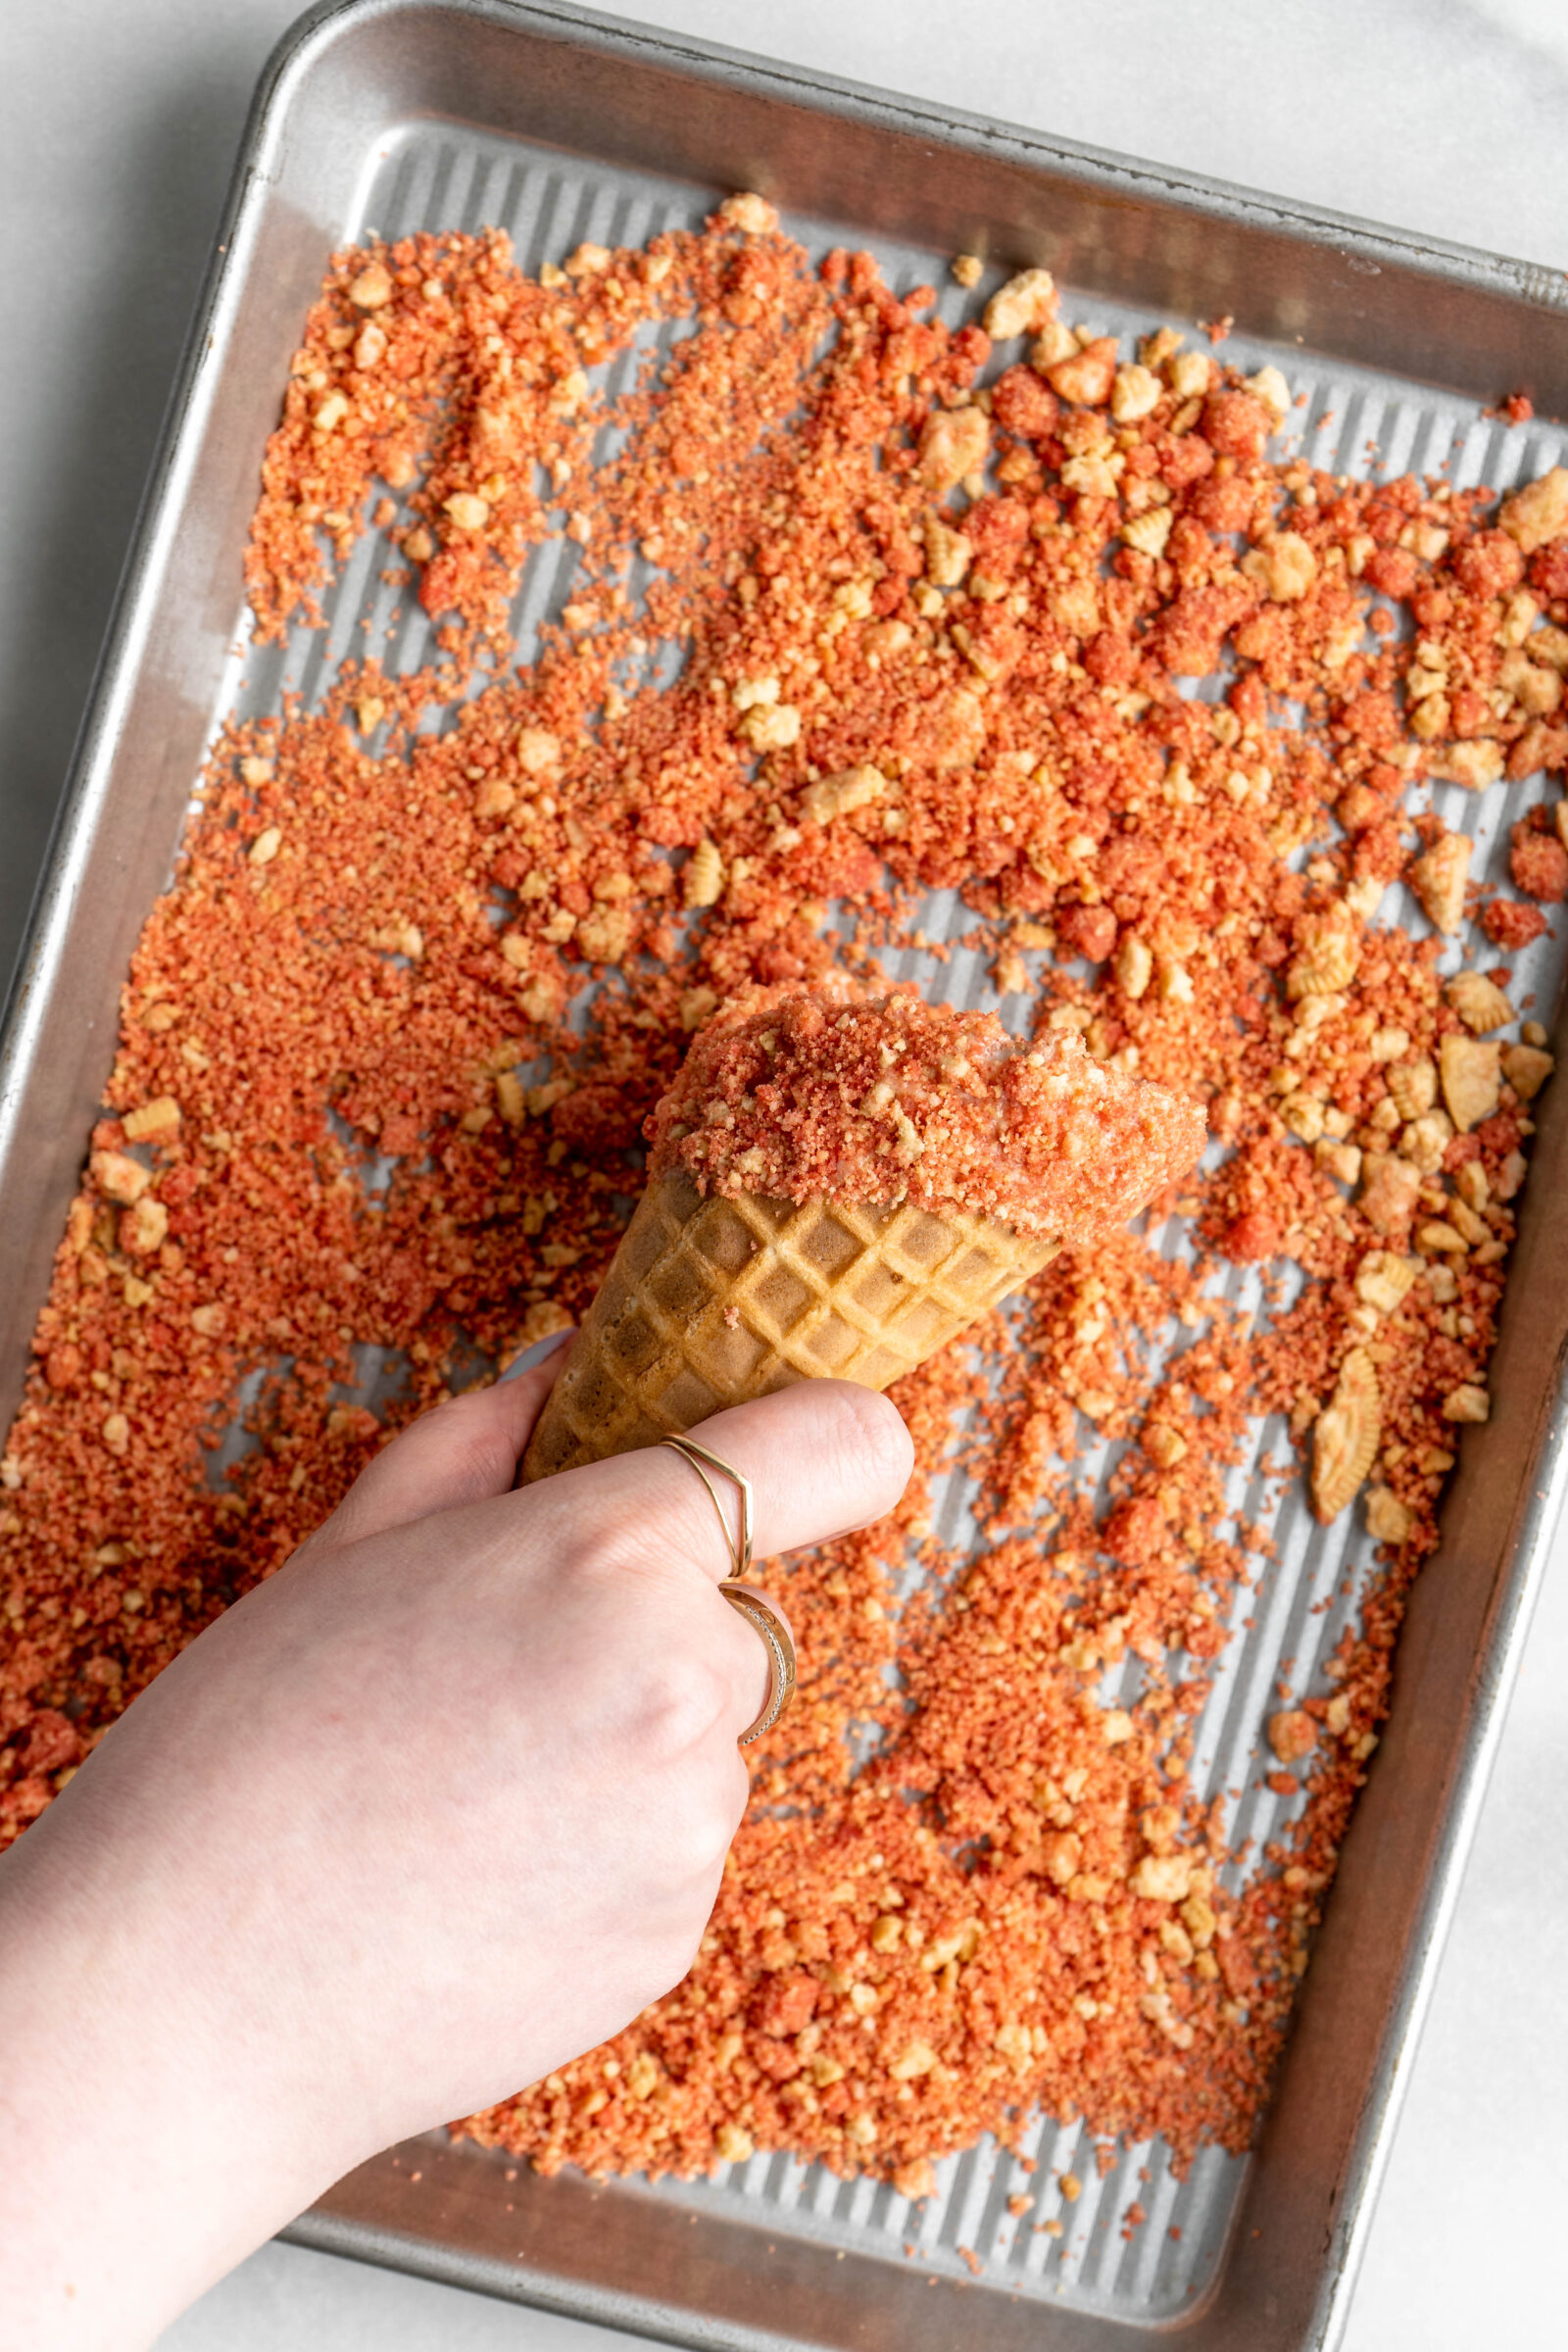
2. Assemble cones: Dip each cone into melted white chocolate, then role into the strawberry crunch. Set aside to dry.
3. Make gelatin: Pour gelatin over 1/4 cup whipped cream, stir, and allow to sit for 3 minutes. Next, place it in the microwave in 10 second intervals, until the gelatin is completely dissolved.
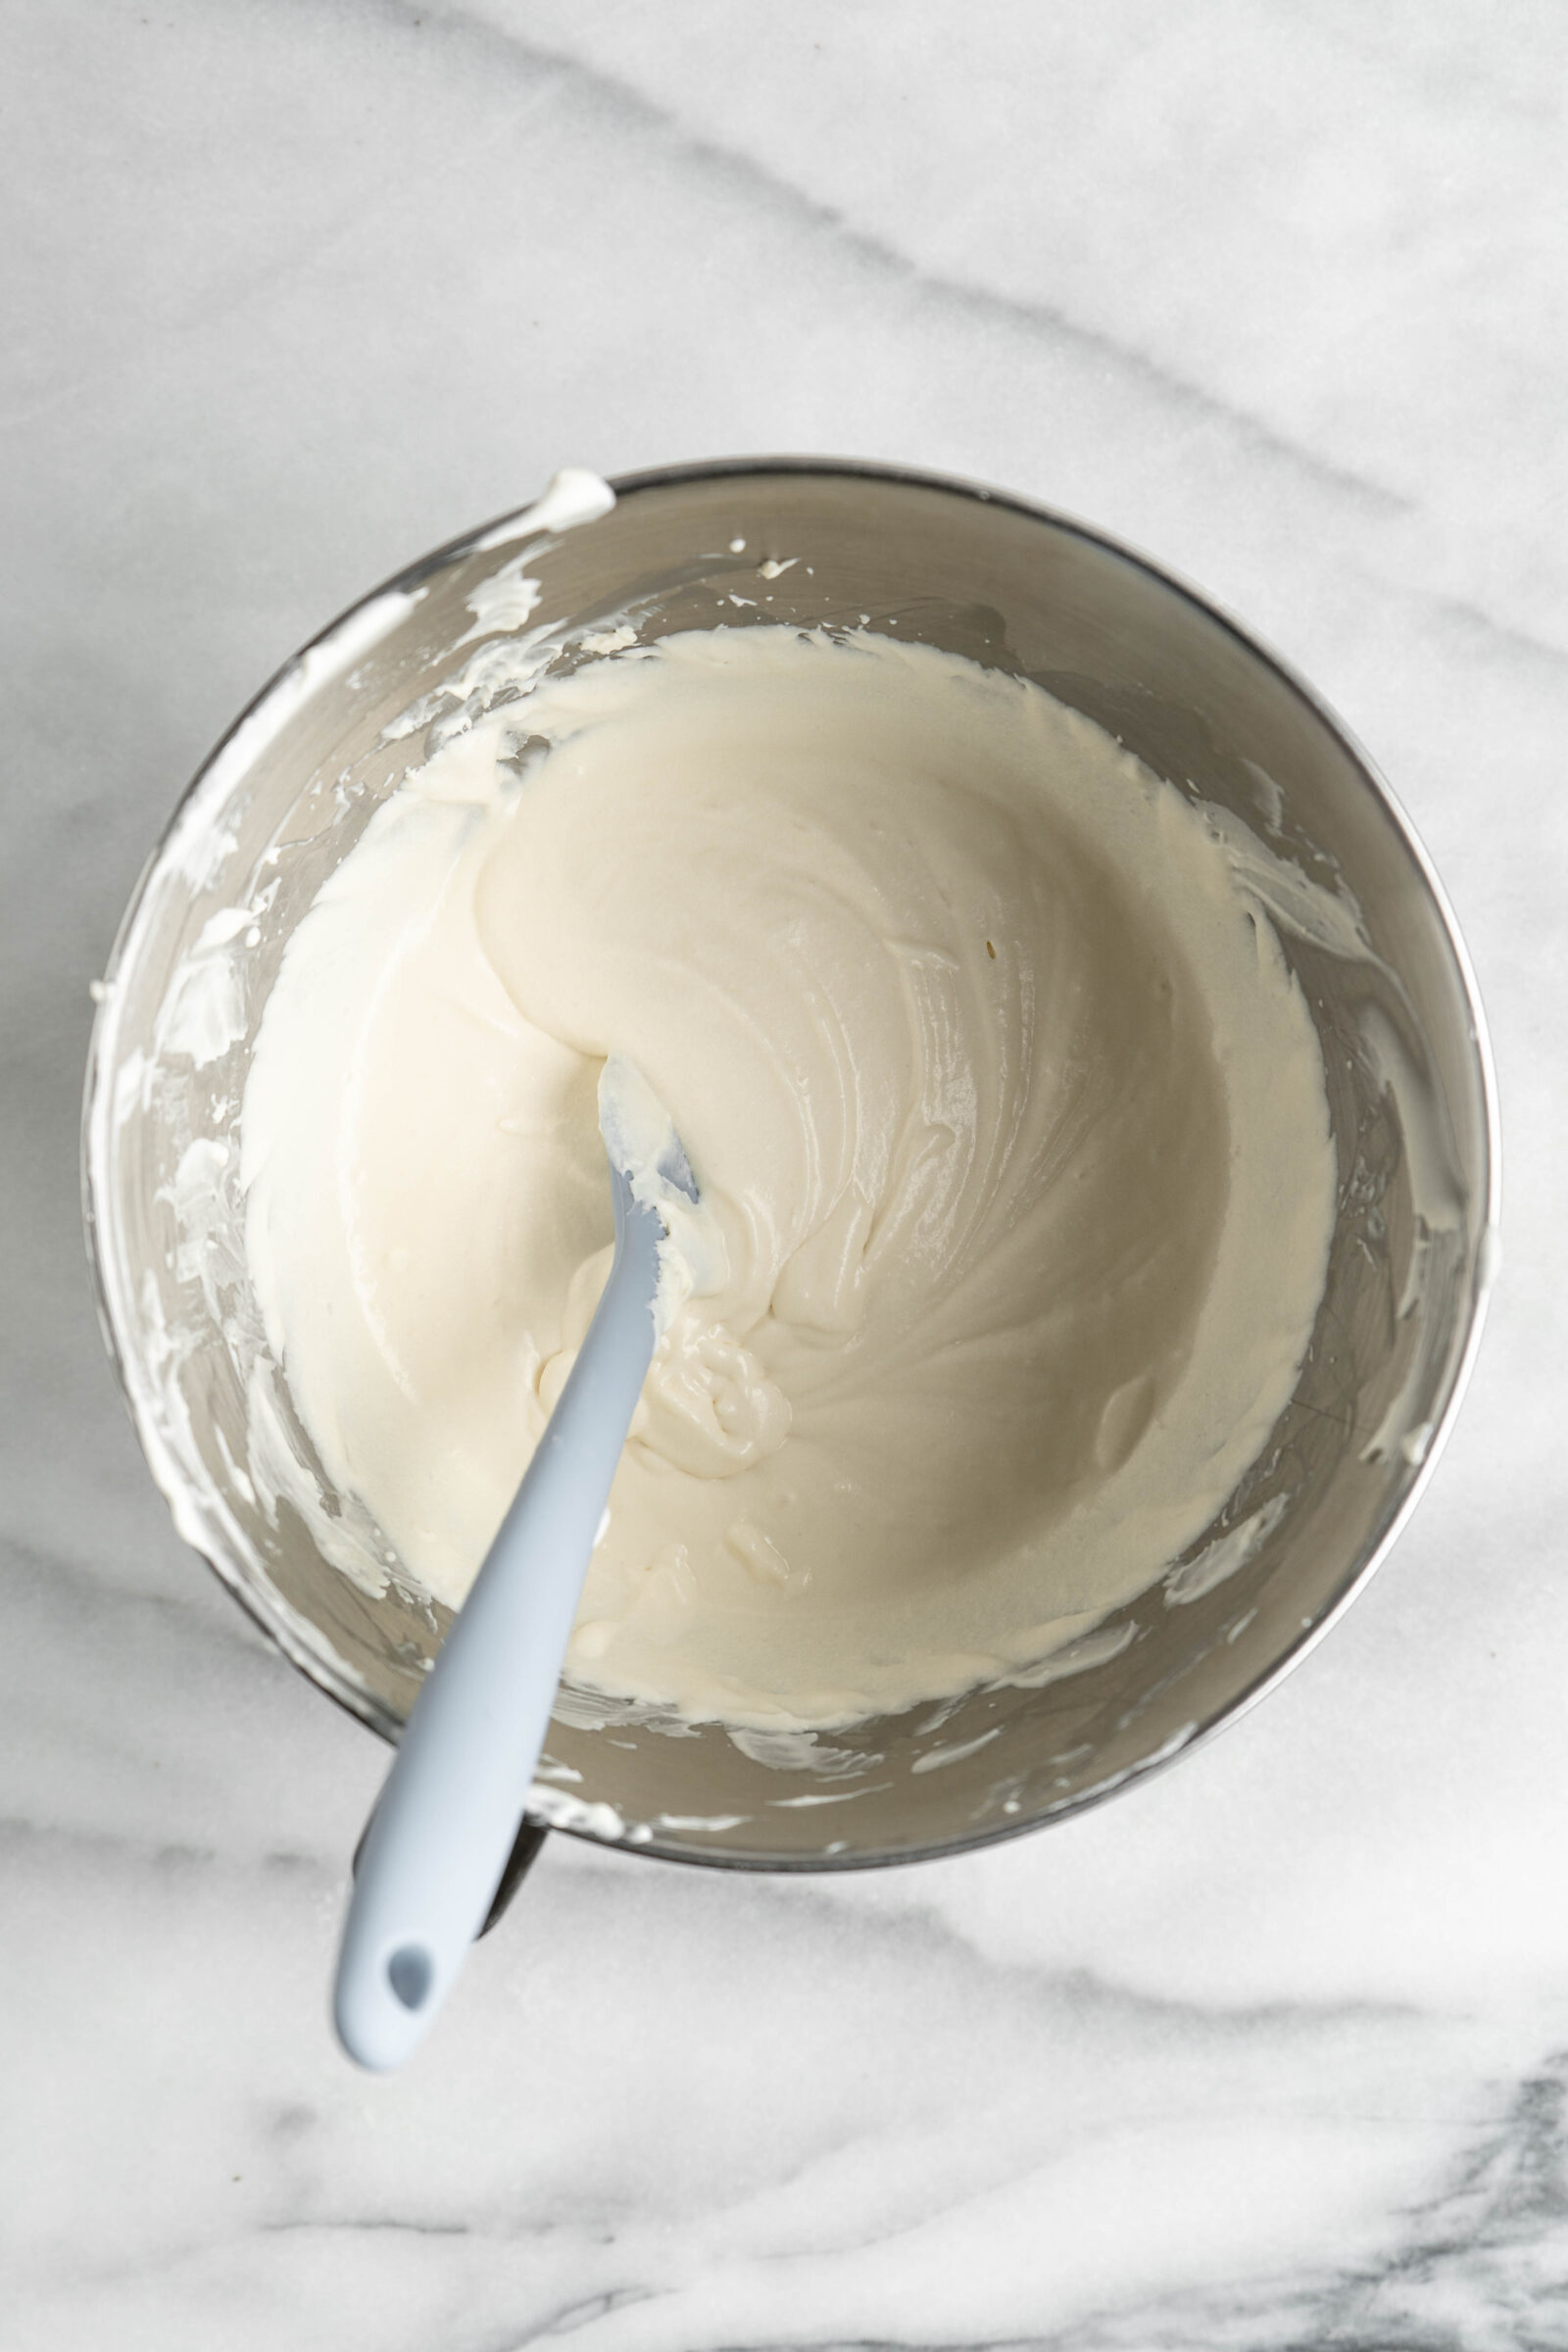
4. Make no bake cheesecake filling: Beat ¾ cup whipped cream and confectioners sugar until stiff peaks have formed. In a separate bowl, beat the cream cheese, sugar, sour cream, vanilla and strawberry jam until smooth. Finally, mix together the cream cheese mixture, whipped cream, and gelatin, until smooth.
5. Allow the filling to “set-up”: Cover the filling, then place into the fridge overnight to set up and stiffen.
6. Pipe filling into cones: Pipe the stiffened cheesecake filling into the prepared strawberry crunch cones. Enjoy immediately or store in the fridge until ready to consume.
Tips & tricks
Keep the stand mixer bowl well chilled. This will ensure your whipped cream stays stiffer longer.
Ensure your cream cheese is softened! Straight from the fridge cream cheese will be very difficult to mix. So, it is essential that it is at room temperature before starting.
If you’re wanting to pipe the cheesecake filling into the cones, allow the filling to thicken in the fridge for 6-8 hours before adding into the cones.
If garnishing with fresh strawberries, add them right before consuming. Cut strawberries will dry out in the fridge, and will get soggy from the freezer.
A food processor will make your life infinitely easier for grinding up the golden oreos, you can make these without one. Add the oreos to a thick plastic bag, then beat with a kitchen mallet until everything is well crumbled.
Use quality white chocolate. Quality white chocolate will make these strawberry crunch cheesecake cones that much better!

Equipment required
Food Processor: A food processor will make your life infinitely easier for grinding up the golden oreos. However, you can make these without one. Add the oreos to a thick plastic bag, then beat with a kitchen mallet until everything is well crumbled.
Stand Mixer or Hand Mixer: Either of these are pretty crucial for mixing together the cheesecake filling and whipping the cream.
Storing the Cheesecake Cones
Fridge: These cheesecake cones can be made and stored in the fridge for 1 day. After 1 day, these will start to get soggy in the fridge.
Freezer: They can be stored in the freezer, in an airtight container, for 2 months.
FAQ
A food processor will make your life infinitely easier for grinding up the golden oreos . However, you can make these without one. Add the oreos to a thick plastic bag, then beat with a kitchen mallet until everything is well crumbled.
A stand mixer or hand mixer will make mixing the cheesecake filling, and whipped cream, MUCH easier, but they can both be done by hand too. Just ensure the cheesecake filling is lump-free and smooth.
Definitely – you may have a few more cheesecake cones though, as sugar cones hold less cheesecake filling that waffle cones.
No, the strawberry jello is what gives the strawberry flavor to the “strawberry crunch”.
The biggest culprit is the whipped cream. Either it wasn’t whipped enough, or it was too-warm when you whipped it and added it into the cheesecake filling. You can try to place the filling into the fridge for a few hours (6-8 hours), and see if it firms up.

Variations
Raspberry: You could make a raspberry version of these by using raspberry jello, and raspberry jam.
Blueberry: As above, these can be made blueberry with blue berry jello, and blueberry jam
Peach Cobbler: This recipe for Peach Cobbler Cheesecake Cones look amazing.
Related recipes
No Churn Strawberry Cheesecake Ice Cream
Raspberry Pistachio Cheesecake
Strawberry Shortcake Layer Cake


Get the Recipe: Strawberry Crunch Cheesecake Cones
Ingredients
Strawberry Crunch Cones
- 12 Golden Oreos
- 4 tbsp Strawberry Jello
- 2 tbsp (28g) Melted Butter
- 6 Waffle Cones
- 3/4 cup (180g) Melted White Chocolate
No Bake Strawberry Cheesecake Filling
- 1/2 envelope (1 ¼ tsp) Gelatin
- 1 cup (230g) Heavy Cream,, divided (3/4 whipped, ¼ for gelatin)
- 2 tbsp Confectioners Sugar
- 2 blocks (908g) Cream Cheese,, softened
- 6 tbsp (75g) White Sugar
- 2 tbsp Sour Cream
- 1 tsp Vanilla
- 1/2 cup (155g) Seedless Strawberry Jam
Equipment
- Food Processor
Instructions
Strawberry Crunch Cones
- Add oreos to a food processor and grind until well broken up – they should resemble wet sand. Add in melted butter and jello, then pulse until combined.
- Pour strawberry crunch onto a plate or baking sheet, then set aside.
- Dip the top of each waffle cone into melted white chocolate, then shake off the excess chocolate. Roll each cone into the strawberry crunch, then set aside to allow the chocolate and crunch to harden.
No Bake Strawberry Cheesecake Filling
- Pour gelatin over 1/4 cup whipped cream, stir, and allow to sit for 3 minutes. Next, place it in the microwave in 10 second intervals, until the gelatin is completely dissolved. Set aside.
- Using a stand mixer or hand mixer, beat ¾ cup whipped cream and confectioners sugar until stiff peaks have formed.
- In a separate bowl, beat the cream cheese, sugar, sour cream, vanilla and strawberry jam until smooth. Mix together the cream cheese mixture, whipped cream, and gelatin, until smooth.
- Cover the cheesecake filling with plastic wrap, then place into the fridge to stiffen for 6 hours.
- Remove from the fridge, then add the filling to a piping bag and pipe the filling into each strawberry crunch cone.