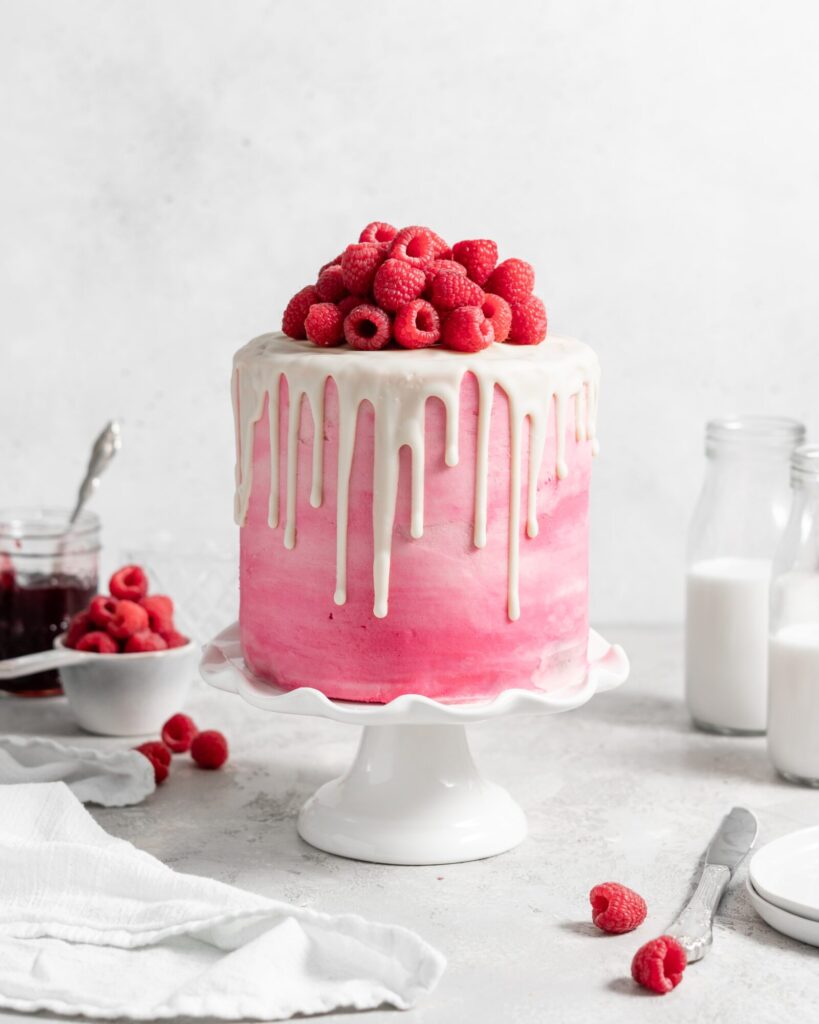
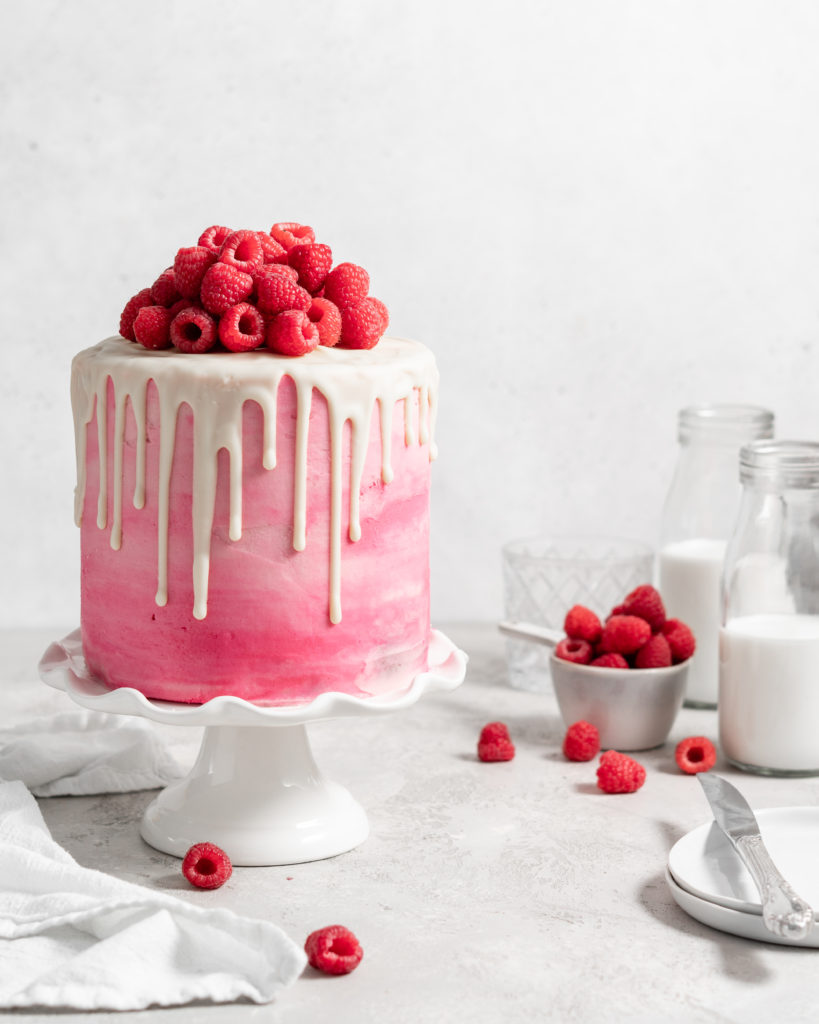
Raspberry White Chocolate Layer Cake
This beautiful, perfect for Valentine’s Day, Raspberry White Chocolate Layer Cake is both gorgeous and delicious! It features 3 soft and fluffy raspberry vanilla cake layers that are stacked together with raspberry jam and raspberry infused buttercream. The final cake is finished with a creamy white chocolate drip and a sky-high piling of fresh raspberries!
OIL VS BUTTER FOR CAKE
When looking at this recipe for Raspberry White Chocolate Cake, you will notice that I didn’t use butter, and instead used oil as my fat. WAIT! Hear me out! First, its easy. Using oil instead of butter makes such easy work of a cake. There’s no need to plan in advance and pull out the butter – you can just grab the oil and start! But the reasoning for using oil is beyond the easiness – 9 times out of 10 it results in a superior texture! Oil-based cakes make for a much moister and more tender texture. Why, you ask? Well, oil does a better job at encapsulating the flour molecules better than butter does. This superior encapsulation results in better lubrication and less gluten formation! YAY!
What all this means is that the cake will be more tender and more moist! While butter provides excellent flavor in a cake or cupcake recipe, if I can get away with using oil, I will always choose oil. And, in this Raspberry White Chocolate Cake, which is full of bright fruity flavor, you’re really not going to miss the flavor that butter provides. It’s a win-win!
MAKING THE RASPBERRY White Chocolate CAKE
1.Beat eggs and sugar: Add the eggs, sugar, and vanilla to your stand mixer, then beat the three together for about 3-4 minutes. By the end, it should be fluffy, and be tripled in volume.
2. Add oil: Turn the stand mixer down to medium speed, then slowly drizzle the oil into the stand mixer while it continues to beat. After all the oil has been added, beat the mixture for another 30 seconds.
3. Whisk together the dry ingredients: In a separate mixing bowl, add the flour, baking powder, and salt, then whisk them together to combine.
4. Alternate add the dry & wet to stand mixer: First add the 1/3 of the dry ingredients, then beat until just combined. Add ½ of the sour cream, and beat until just combined. Continue adding the wet & dry in this order, until all of the ingredients have been added (you’ll finish with the dry). Lastly, fold in the raspberries!
5. Add to pan & bake: Pour the raspberry cake batter into 3 prepared 6” cake pans, then place into the oven to bake! When done, allow the cake layers to cool completely before assembling!
FILLING & FROSTING THE Raspberry White Chocolate Cake
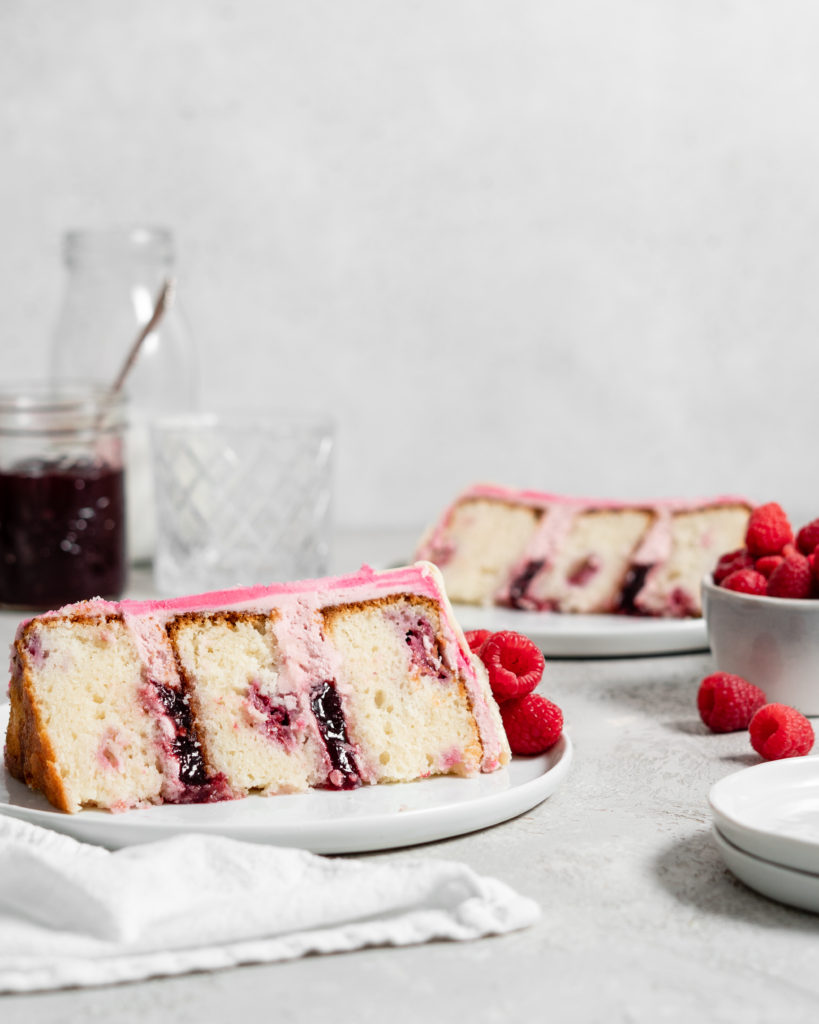
Begin assembling the raspberry cake by removing any doming from the cakes and leveling each cake layer. Next, spread a thin layer of buttercream over the cut-side of each cake layer. Place your first layer onto your serving plate or cardboard cake circle. Next, pipe a dam around that first cake layer.
What is a dam? A dam is a small piped layer of frosting that goes along the perimeter of the cake layer. This dam prevents any filling from escaping out of the centre of the cake. After piping this dam, spread about a 1/2 cup of seedless raspberry jam inside the dam. Place the next cake layer on top, then repeat the process. Place your last cake layer on top, then frost the entire outside of the cake.
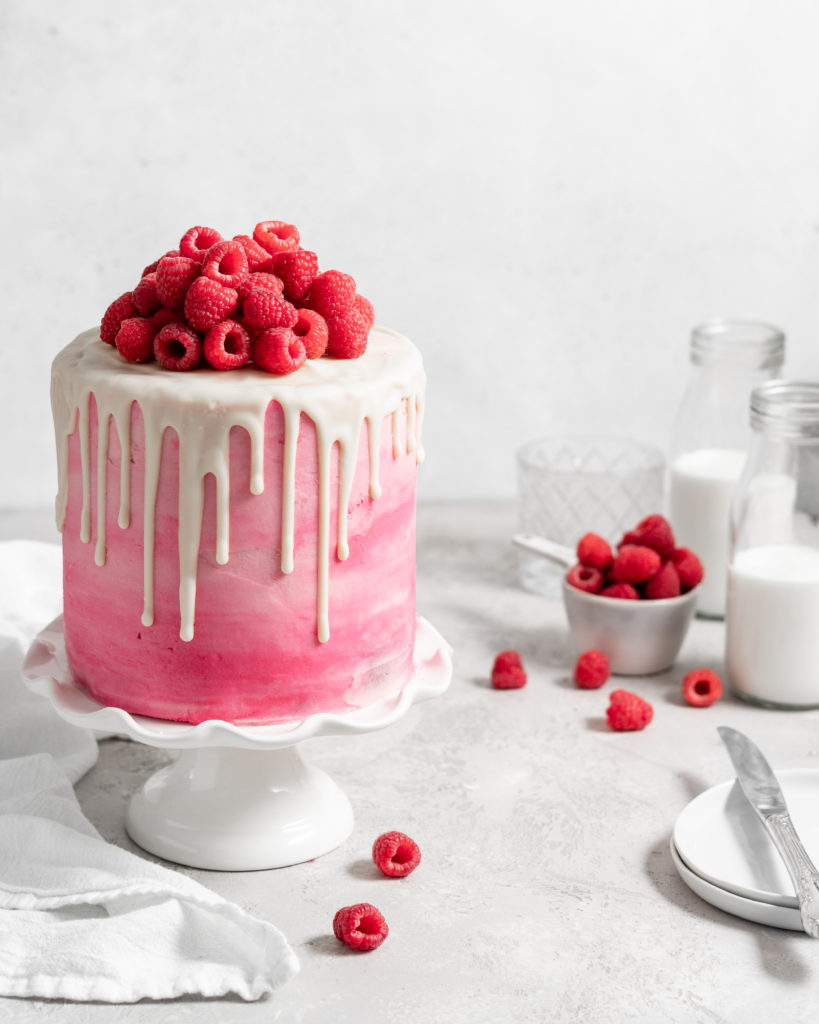
To make the marbled effect on this cake, I divided the prepared buttercream up by adding about 1/3 of it to a separate bowl. Then, I added food coloring to it to deepen and saturate the colour more. When applying to the cake, I used the lighter buttercream to pipe the dams, then I alternated applying each buttercream onto the cake in spots. Then, after the entire cake was covered in the spots of buttercream, I used my cake scraper to even smooth the buttercream, which simultaneously meshes the two colors together creating a marbled look!
Get the Recipe: Raspberry White Chocolate Cake
Ingredients
Raspberry Vanilla Cake Layers
- 360 g All Purpose Flour,, about 3 cups measured volumetrically
- 2 tsp Baking Powder
- 1 tsp Salt
- 2 cups (400g) White Sugar
- 4 Large Eggs
- 1 tbsp Vanilla
- 1 cup (240ml) Vegetable Oil
- 1 1/3 cups (320ml) Full Fat Sour Cream
- 1 cup (125g) Fresh Raspberries
Raspberry Buttercream
- 7 cups (840g) Confectioners Sugar
- 2 cups (454g) Unsalted Butter,, at room temperature
- 1 ¾ cups (420ml) Seedless Raspberry Jam,, divided
- Pinch of Salt
White Chocolate Drip
- 3.5 oz (100g) High Quality White Chocolate,, finely chopped
- 3 tbsp (44g) Heavy Cream
Equipment
- Stand mixer
Instructions
Raspberry Vanilla Cake Layers
- Preheat oven to 350°F, and prepare three 6” springform cake pans with cooking spray and parchment rounds. In a medium to large sized mixing bowl, add the flour, baking powder, and salt, then whisk together to combine.
- In a stand mixer fitted with paddle attachment, add eggs, sugar and vanilla. Beat on high for around 5 minutes, the mixture should look thick, fluffy, and be tripled in volume. Then, slowly drizzle in the oil. After all the oil has been added, beat for an additional minute.
- On low, add the dry mixture to the stand mixer in 3 additions, alternating with the sour cream in between. Beat only until the batter becomes smooth. Fold in the raspberries.
- Divide the batter between the three pans, then bake in the oven for around 45 to 50 minutes, or until a toothpick comes out clean. Allow cakes to cool completely before assembling.
Raspberry Buttercream
- Add butter to a stand mixer fitted with the whisk attachment. Beat on high until butter is doubled in volume, and looks light and fluffy.
- Turn the stand mixer to low and slowly add the confectioners sugar. Beat until completely incorporated, then add in 3/4 cup (180ml) of the raspberry jam and salt. Beat until well-combined and fully incorporated.
Frosting & Finishing the Cake
- Level off each of the cake layers to remove any doming from the cakes. Spread a thin layer of buttercream across the cut-side of each cake layer.
- Place one cake layer onto your serving plate or onto a cardboard cake circle. Pipe a frosting dam along the perimeter of the cake layer. Add 1/2 cup (120ml) of raspberry jam into the centre of the dam and spread it out evenly.
- Add the second layer on top, then repeat step 2.
- Add the final layer onto the cake, then frost the outside and top with the remaining frosting. Place the cake into the fridge for about 2 hours.
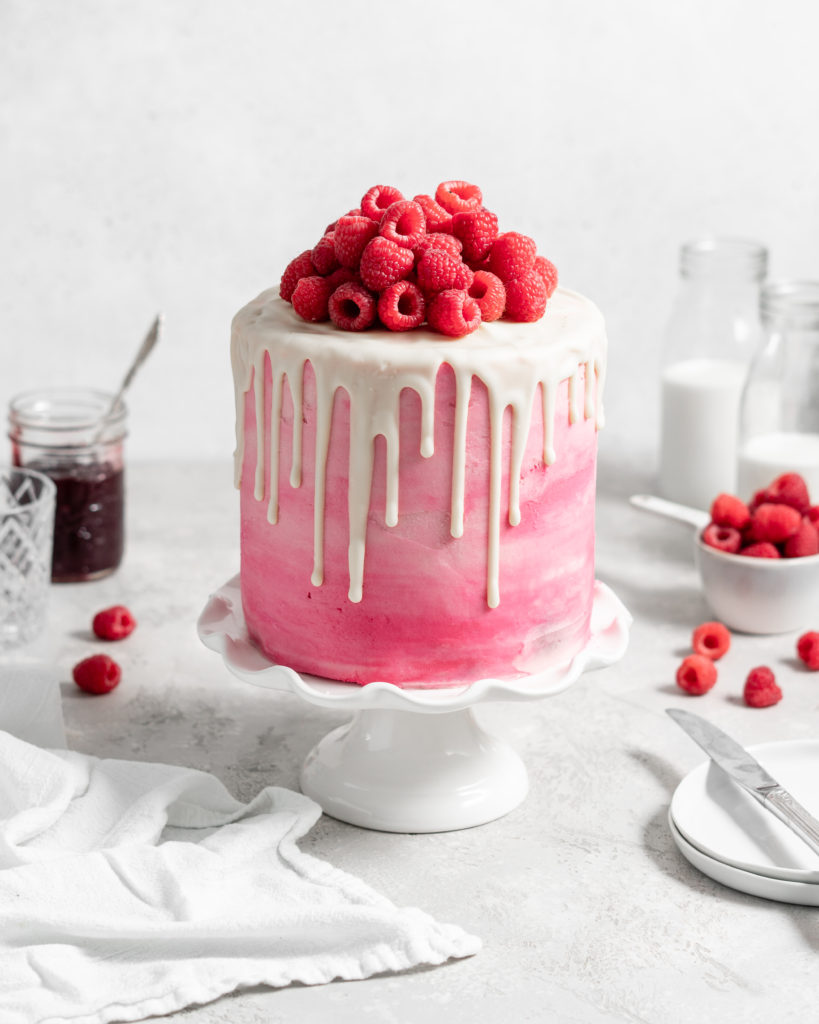
- Add the chopped chocolate and cream to a heatproof bowl and place over of a pot of simmering water, ensuring the bowl fits tightly over the pot of water and that the bottom does not touch the water. Heat, while stirring with a rubber spatula, until all of the chocolate has melted and everything looks smooth. Set aside to cool slightly. For a perfectly white look, add a small amount of food whitening gel.
- Remove the cake from the fridge and pour the white chocolate over the top of the cake, then use a spoon to lightly encourage the white chocolate to drip down the sides of the cake. Top the finished cake with more fresh raspberries.

Can the cake be made and decorated in advance and frozen fully assembled?
You can freeze the entire cake decorated but it might have an effect on the final texture of the cake. If you need to make in advance I recommend freezing the cake layers wrapped in plastic and tinfoil, and then filling and frosting soon before serving. If you do decide to freeze the entire finished cake, freeze it for 8-12 hours, then take it out and wrap it with plastic wrap and tinfoil to try to preserve as much moisture as possible.
After piping a dam on a layer and filling with jam, how much frosting do we add on top of the jam? Thank you
Just spread a thin layer onto the cut side of the cake layer – it’s just to prevent the cake from absorbing the jam.
Can I use 8 inch tins if I double the recipe or 9 inch tins if I triple the recipe? Thanks!
Hi! If you use 8” pans and double the recipe, you’ll have just a little bit of batter left over. And for 9” pans, I would just double the recipe, and not triple it!